In the dynamic and constantly evolving field of web development, Headless WordPress stands out as a robust and inventive method. It has reimagined the process of creating a website by decoupling the front-end presentation layer of the website from the back-end content management system.
You can’t ignore the benefits of headless WordPress in contemporary web development. It offers the freedom to design complex and dynamic user interfaces via a front-end technology stack- React, Vue, Angular, and so on. Thus, WordPress is not limited to PHP anymore, and developers can now use whatever language they are familiar with.
Since the front-end and back-end can scale separately, it unleashes improved performance, flexibility, and distribution. Plus, it creates opportunities for using the same WordPress back-end to create mobile applications, Progressive Web applications (PWAs), as well as other digital experiences.
In this article, we will discuss the core components of Headless WordPress, the libraries that bring it to life, the setup process, and the benefits it offers.
Concept of a Headless WordPress Site
In a conventional WordPress setup, the CMS manages both the front-end and back-end aspects of the website. However, the headless approach provides developers the freedom to construct the user interface using advanced web framework technologies. This is done while capitalizing on WordPress’s powerful content management features.
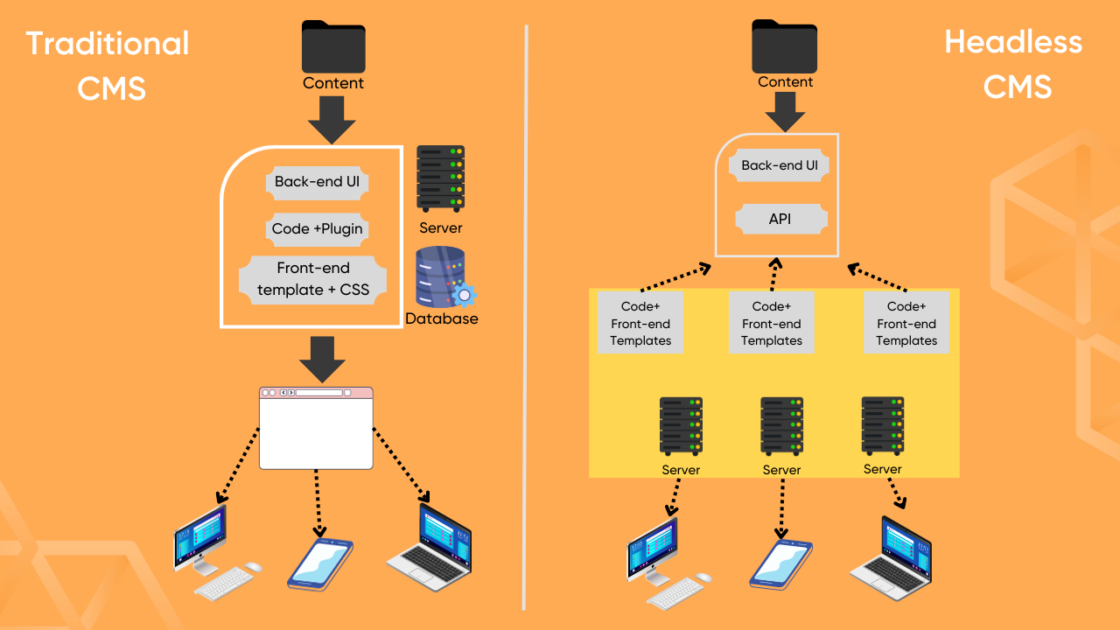

Consider a typical WordPress website as a coin with two sides where one represents the user interface and the other represents the server-side operations and database. So, the coin is effectively divided into two different entities by a headless WordPress website.
Due to this division, we developers can create highly customized user experiences. For example, they can create single-page Apps, include out-of-the-box features, or create unique layouts that are unrestricted by the WordPress template system.
With this configuration, WordPress becomes a headless CMS focused on organizing and storing the content. Meanwhile, the task of displaying the content to the viewer can be handled by different technologies.
Using Headless architecture, you can upload, craft, and customize the content. However, it uses REST API to make its resources accessible to independent front-end solutions without delivering it directly to the front-end.
Core Components of Headless CMS
Let’s make the concept of Headless CMS clearer by stacking up all the core components that come together to provide a smooth site-building experience.
Here are the core components of Headless WordPress:
- WordPress as a CMS: WordPress functions only as a Content Management System (CMS) in a headless environment. It takes charge of content creation, management, and storage. WordPress’s administrative dashboard stays the same, giving content producers access to the recognizable interface for handling content.
- REST API or GraphQL: These interfaces enable the front end to communicate with the back end of WordPress. WordPress comes with a REST API that offers endpoints for many kinds of content. In contrast, GraphQL is an updated option that enables clients to request certain data, significantly resulting in a reduction in the quantity of data delivered.
- The Front-end: In this section, developers can create the website’s front end using their preferred or any popular web technology or framework—React, Vue.js, Angular, etc. So, by liberating WordPress from its PHP-based templating framework, UI design can be carried out with more freedom and originality.
- Hosting Environment: Since the back and front are independent components, they can be hosted on multiple servers. This means the back end of WordPress can be hosted on a conventional server, while the front end can be hosted on a server appropriate for the selected technological stack.
- Content Delivery Network (CDN): By employing a content delivery network in conjunction with a headless design, you can significantly boost site speed by caching and distributing content globally over several servers.
- Progressive Web Apps (PWAs): Headless WordPress flawlessly integrates with Progressive Web Apps (PWAs) that provide an experience similar to the app. As a result, developers can now create responsive and engaging PWAs that load quickly and perform way better.
Essential Libraries and Frameworks for Headless WordPress
There are several JavaScript libraries and frameworks that assist developers with tools to create headless WordPress sites. These tools will assist you in crafting dynamic, interactive, and high-performing front-end experiences.
These are some essential libraries and frameworks used in Headless WordPress:
#1. React
One renowned JavaScript library for creating user interfaces is called React. It offers quick rendering and a component-based design, which is a remarkable option for building a Headless WordPress application’s front end.

I personally like some of the features, which include Virtual DOM, component usage, lifecycle methods, JavaScript Syntax extension (JSX), data binding (one-way), etc. With these features, developers can manage the user interface components effectively to create a unique user experience.
#2. Angular
Google is behind the creation of Angular, a feature-rich and open-source JavaScript library. It provides strong capabilities and tools for developing intricate web applications.

Some of the core features are template transformation into codes, Model Vie Control architecture (MVC), and data binding (two-way). CLI, IDEs, virtual scrolling, dependency injection, etc. So, users will get organized methods for developing component-based applications that make it possible to handle data and state productively.
#3. Vue
Vue is an excellent JavaScript framework that excels in creating interactive user interfaces. It’s popular for being straightforward and simple to integrate, which makes it a great option for the font end of Headless WordPress.

The model-view-view model (MVVM) architecture is one of the mentionable aspects of this platform. Moreover, it offers intuitive API, detailed documentation, Virtual DOM, declarative rendering, etc.
#4. Next
Next is a React-based framework that makes it easier to create server-rendered React apps. With capabilities such as server-side rendering, static site creation, and route-based code separations, it’s ideal for headless WordPress applications.

Moreover, the performance and SEO are both improved with the smooth integration of WordPress data into the front end. Well, I think this is another great option due to the features it offers for crafting Headless CMS.
#5. Gatsby
Gatsby is another React-based framework that’s all about creating lightning-fast webpages and apps. By fetching data during the ongoing build process, it produces static websites with exceptional user experience.


For Headless WordPress site generation, some of the best features of this platform are the GraphQL data layer, PWA support, Extensive plugin Ecosystem, Content prefetching and caching, etc.
#6. Redux
When it comes to Headless WordPress, Redux works as a crucial state management tool.
In JavaScript applications, it comes with a predictable state container. So, this is crucial for creating complex headless WordPress apps where proper state management is required.
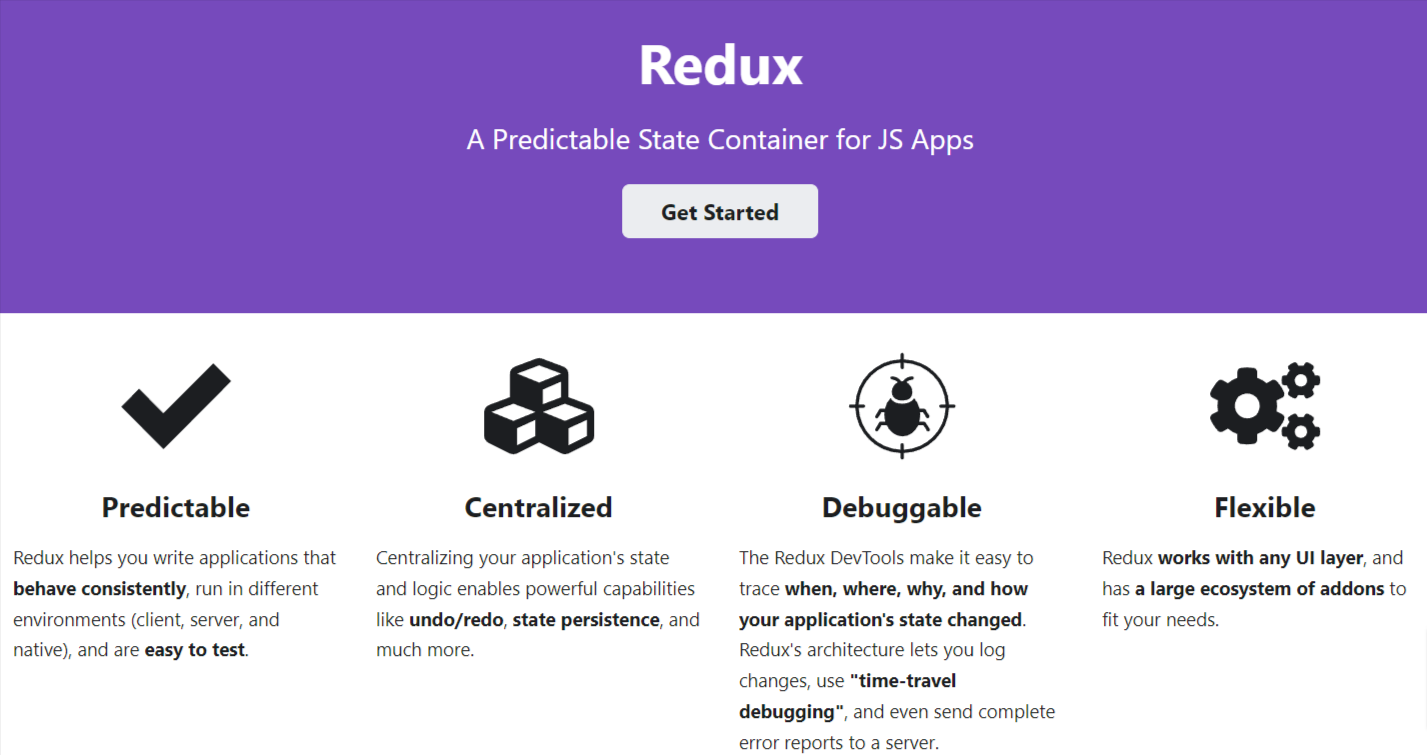

Redux provides centralized stores that make state management easier in the WordPress environment. As a result, maintaining a smooth and effective user experience becomes simple while retrieving content from the backend.
Benefits of a Headless WordPress Site
There are a lot of advantages of installing headless WordPress compared to a few demerits:


Flexibility With Innovation
Headless WordPress separates the back end of the site from the front end. Hence, developers get the freedom to implement the most suitable technologies for both ends. This leads to creative and personalized solutions that match unique project requirements.
Better User Experience
With a Headless Approach, creating a dynamic and interactive user interface becomes easier. The process includes advanced and various front-end frameworks and libraries. Thus, developers can create solutions with rich user experience by raising engagement and satisfaction levels.
Enhanced Performance
Headless WordPress uses API to boost data retrieval from the backend, which results in quicker page loading time. So, a quicker and more responsive site means less server load time and enhanced content delivery.
Scalability
Autonomous scalability is possible with a headless approach because the back end and front-end are kept apart. With the expansion of the website, a scalable design will be guaranteed by the backends’ ability to manage high traffic volumes and frequent content changes without degrading the frontend’s performance.
Increased Security
Decoupling the backend will minimize the chance of security threats because the CMS won’t be accessible directly. So, the security measures are concentrated on the back end, which ensures a reliable and safe content management system.
Multi-channel Publishing
While using APIs, content crafted and managed in WordPress can be effortlessly shared across several channels. Thus, users will get a flawless cross-channel experience across the website, mobile apps, and more.
Content Management Flexibility
WordPress is bliss for content writers and editors since content management is still pretty handy. The frontend’s separation from the backend does not interfere with its user-friendly content generation process.
Let’s explore some easy ways to set up a headless WordPress CMS
How to Setup a Headless WordPress CMS
As we’ve mentioned earlier, you need to separate the back end from the front end, which is a mandate for a headless WordPress site. This will give developers a huge control over front-end presentation and back-end separately.


You can either use a manual approach or a tool to decouple the front-end and back-end for your headless site. A professional can help you precisely with the process that suits best your business site. But the process is not that overwhelming to follow.
Before deploying your Headless WordPress site online, you should first create it in a local development environment. We will then show how the React framework can pull the data in the front end from the local WordPress installation.
So, let’s follow the below-mentioned steps to set up a Headless WordPress environment:
#1. Setting Up WordPress Locally
This step requires you to set up a local development environment where you configure the entire WordPress site and basically the back end. Here are the steps:
- Firstly, you need to Install a local server environment by installing apps like XAMPP or LocalWP. However, I am using the Localwp for this instance.
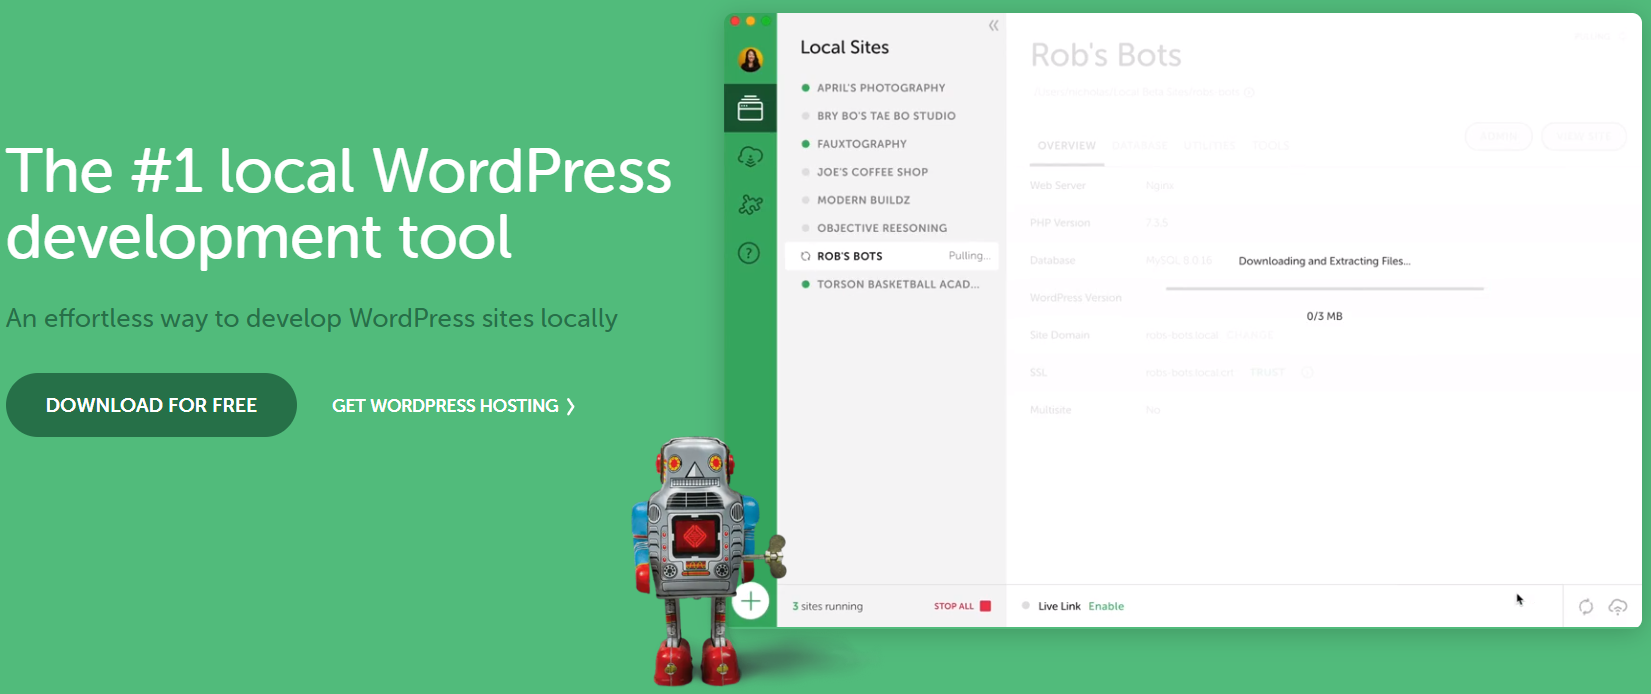

- Then, you need to download and install the latest version of WordPress in the specified directory of your local server environment. But if you are using the Localwp, the entire process is automated and will go through the software. After installing the app on your device, simply click the Create A New Site button and select WordPress.
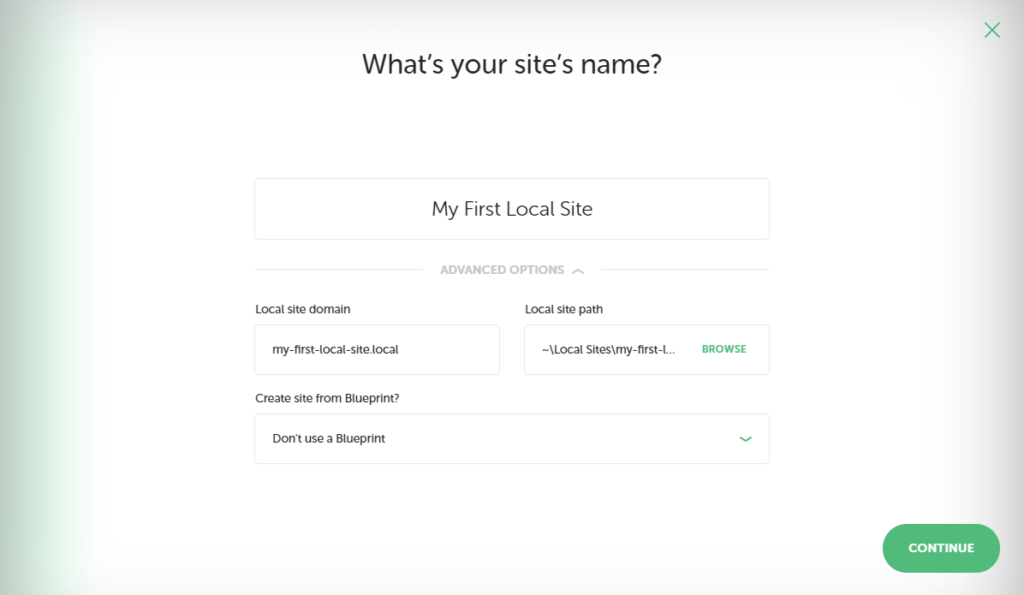

- Follow along with the basic WordPress installation steps and configure the language, database, username, and password.
- Now access your dashboard from the browser by going to the following link: http://localhost/your_wordpress_directory/wp-admin/
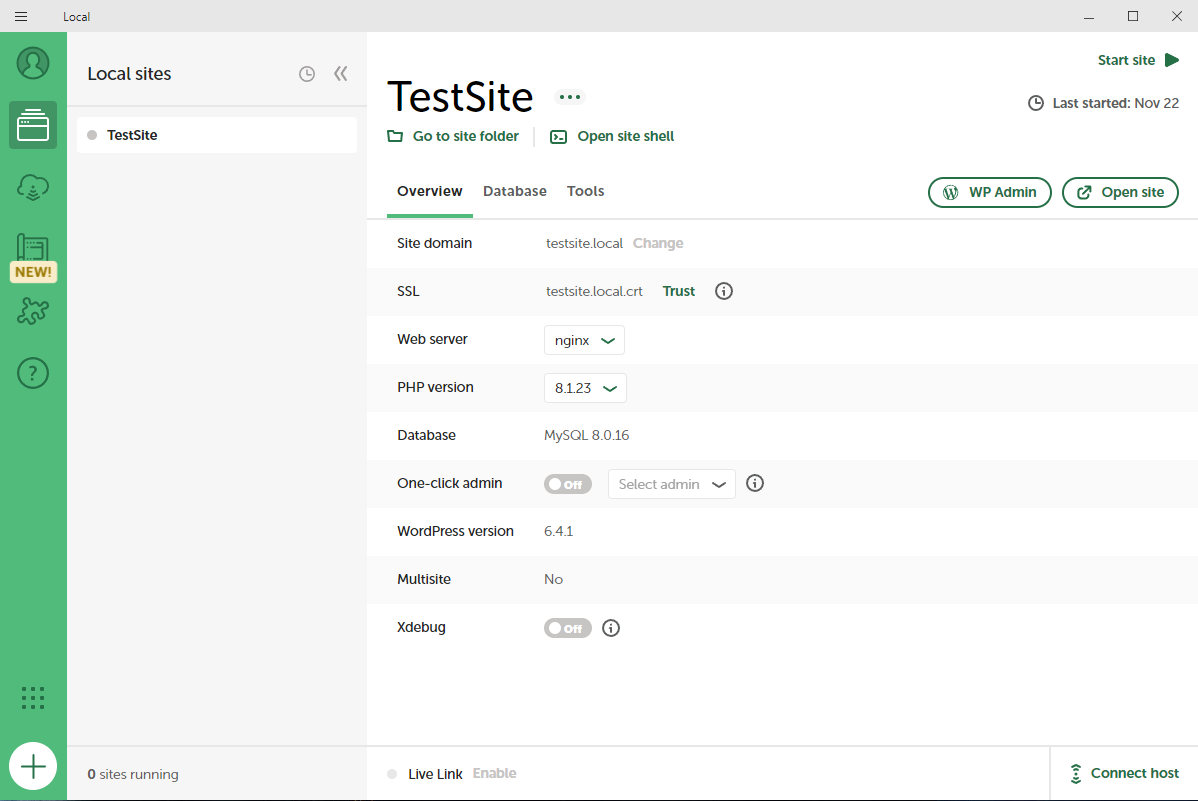
- If you are using the LocalWP, you can simply run the website using the app. Simply click the WP Admin, which will open the admin area where you need to username and password and access your WordPress site.

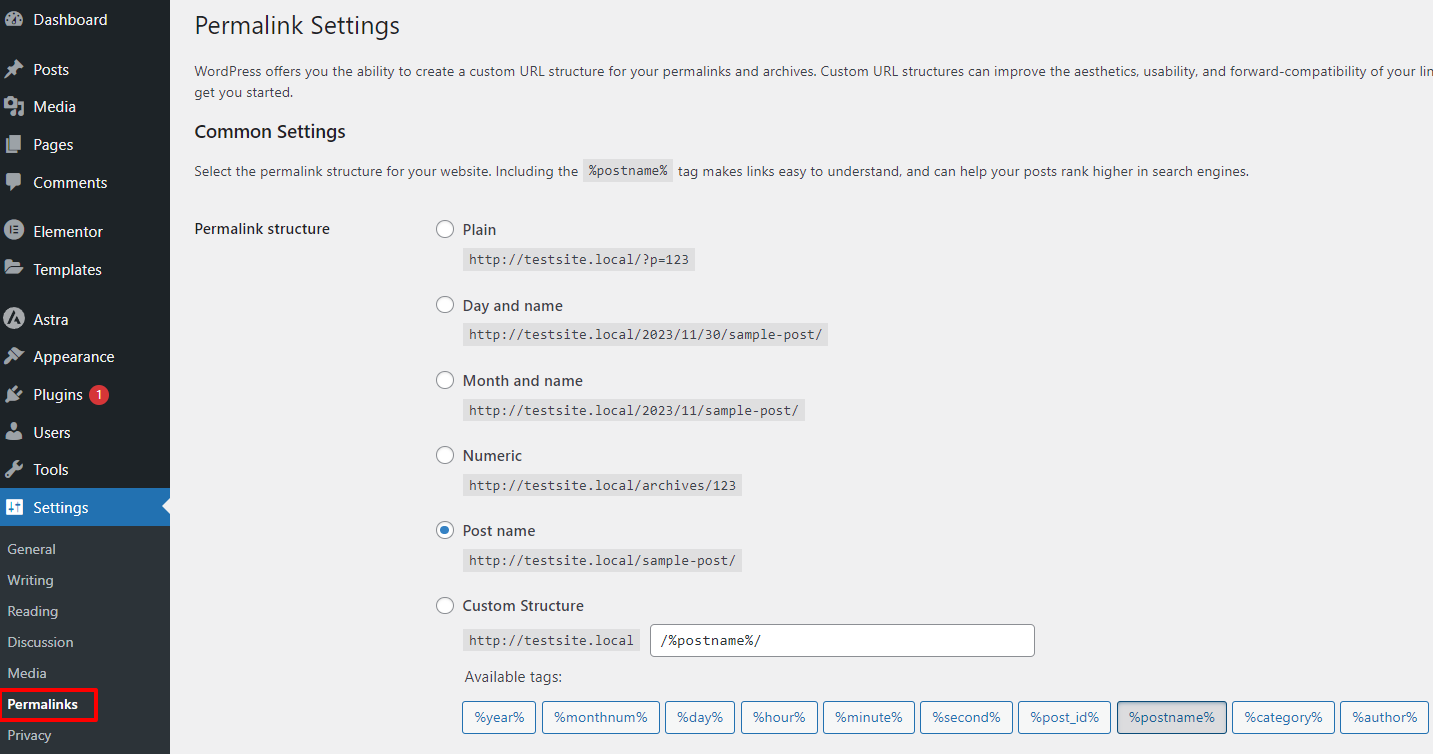
- After accessing your dashboard, go to Settings> Permalinks and select Post Name or the preferred permalink structure of your website.

- Simply create posts and publish the sample posts on your site. You can also create custom posts, but it is optional. At this point, you have your content ready to represent in your headless WordPress site.
Now, let’s focus on the front-end technology for the headless architecture that I will establish using React.
#2. Setting up The React App
Since our WordPress site is ready to use, I will now be preparing the front end using React JS. Here are the steps that you should follow carefully:
- Go to the official website, download, and install Node.js on your desktop.
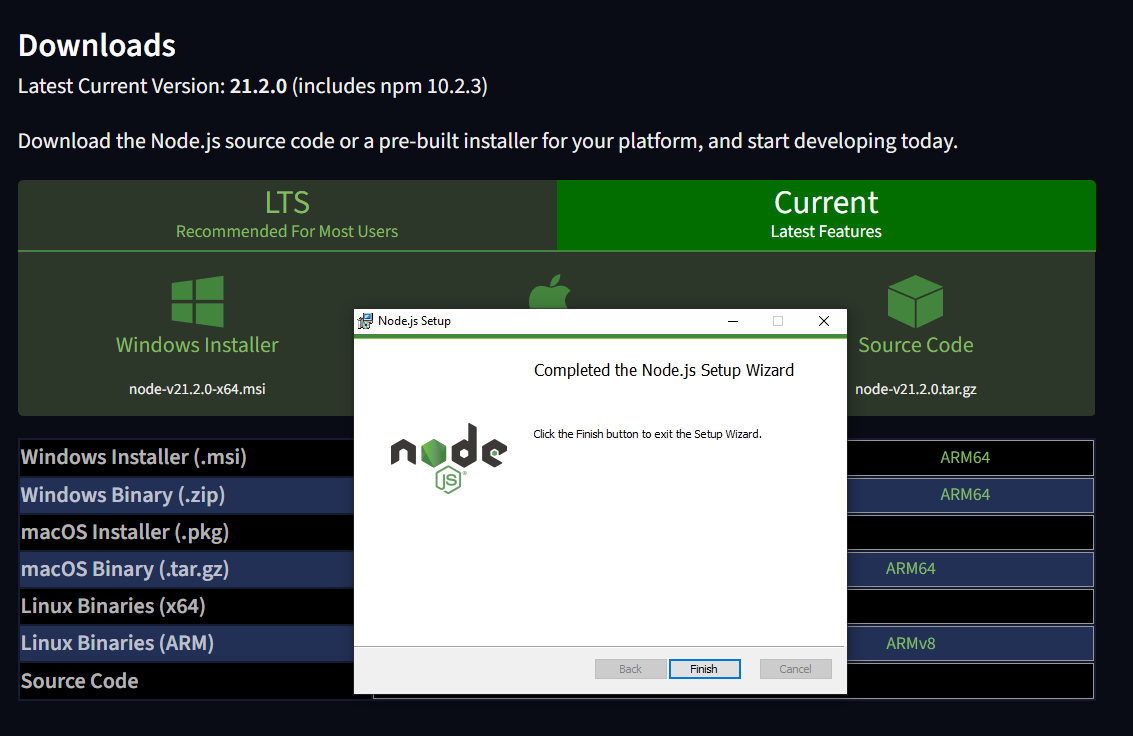

When the installation is done, open the command prompt and write the following command:
node -v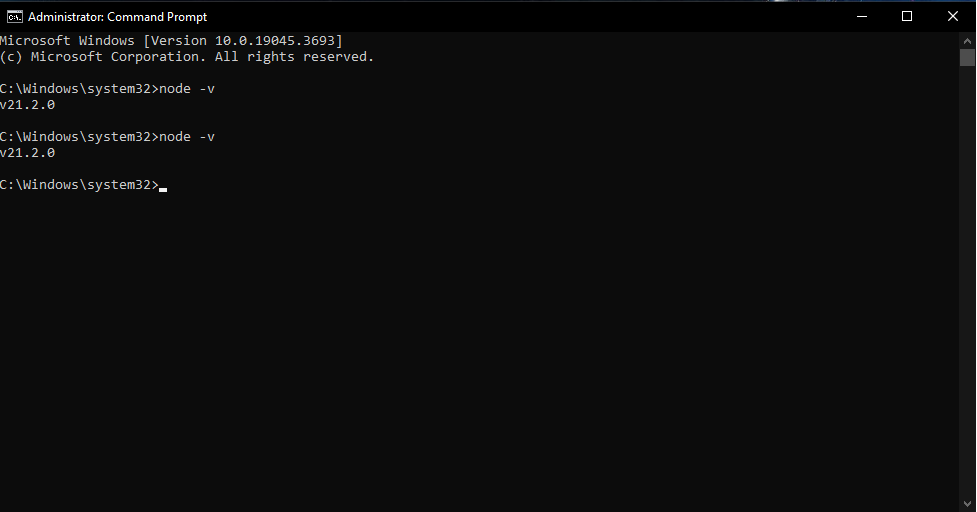

In my cmd, I went through these steps to install my blog app in React. Use the following codes and go along with the instructions to install my blog app.
npm create vite@latest my-blog-app
cd my-blog-app
npm install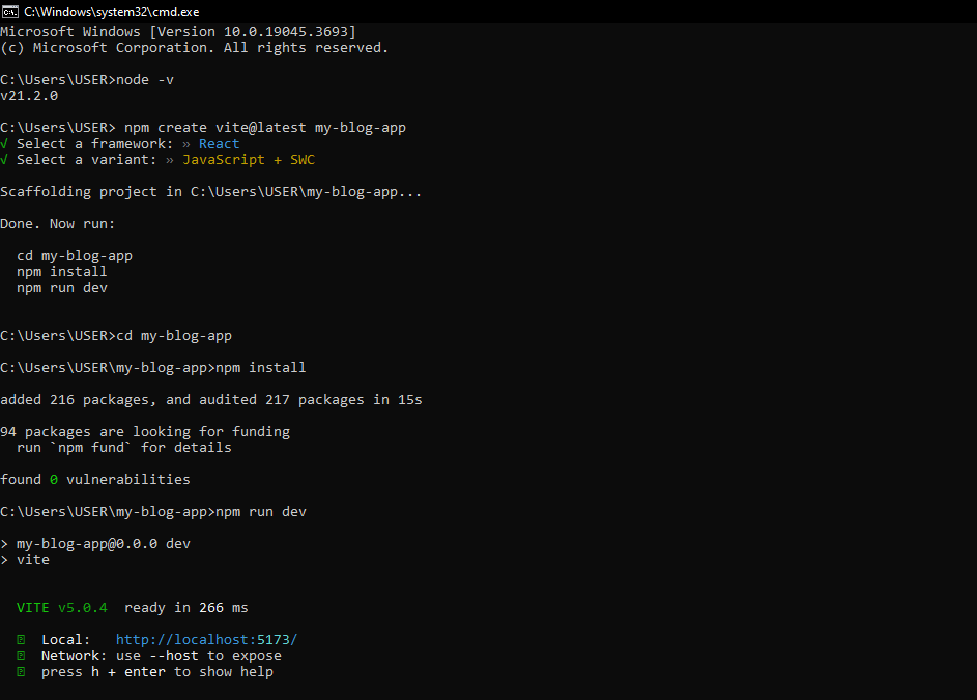

- Keep in mind that the folder I’ve chosen is USER, so everything will run from this folder. Plus, the my-blog-app is also installed in that folder, and Vite@latest is a tool that will help you run this app in the front end.
- As you can see, if you go to http://localhost:5173/, it will open a local development environment.
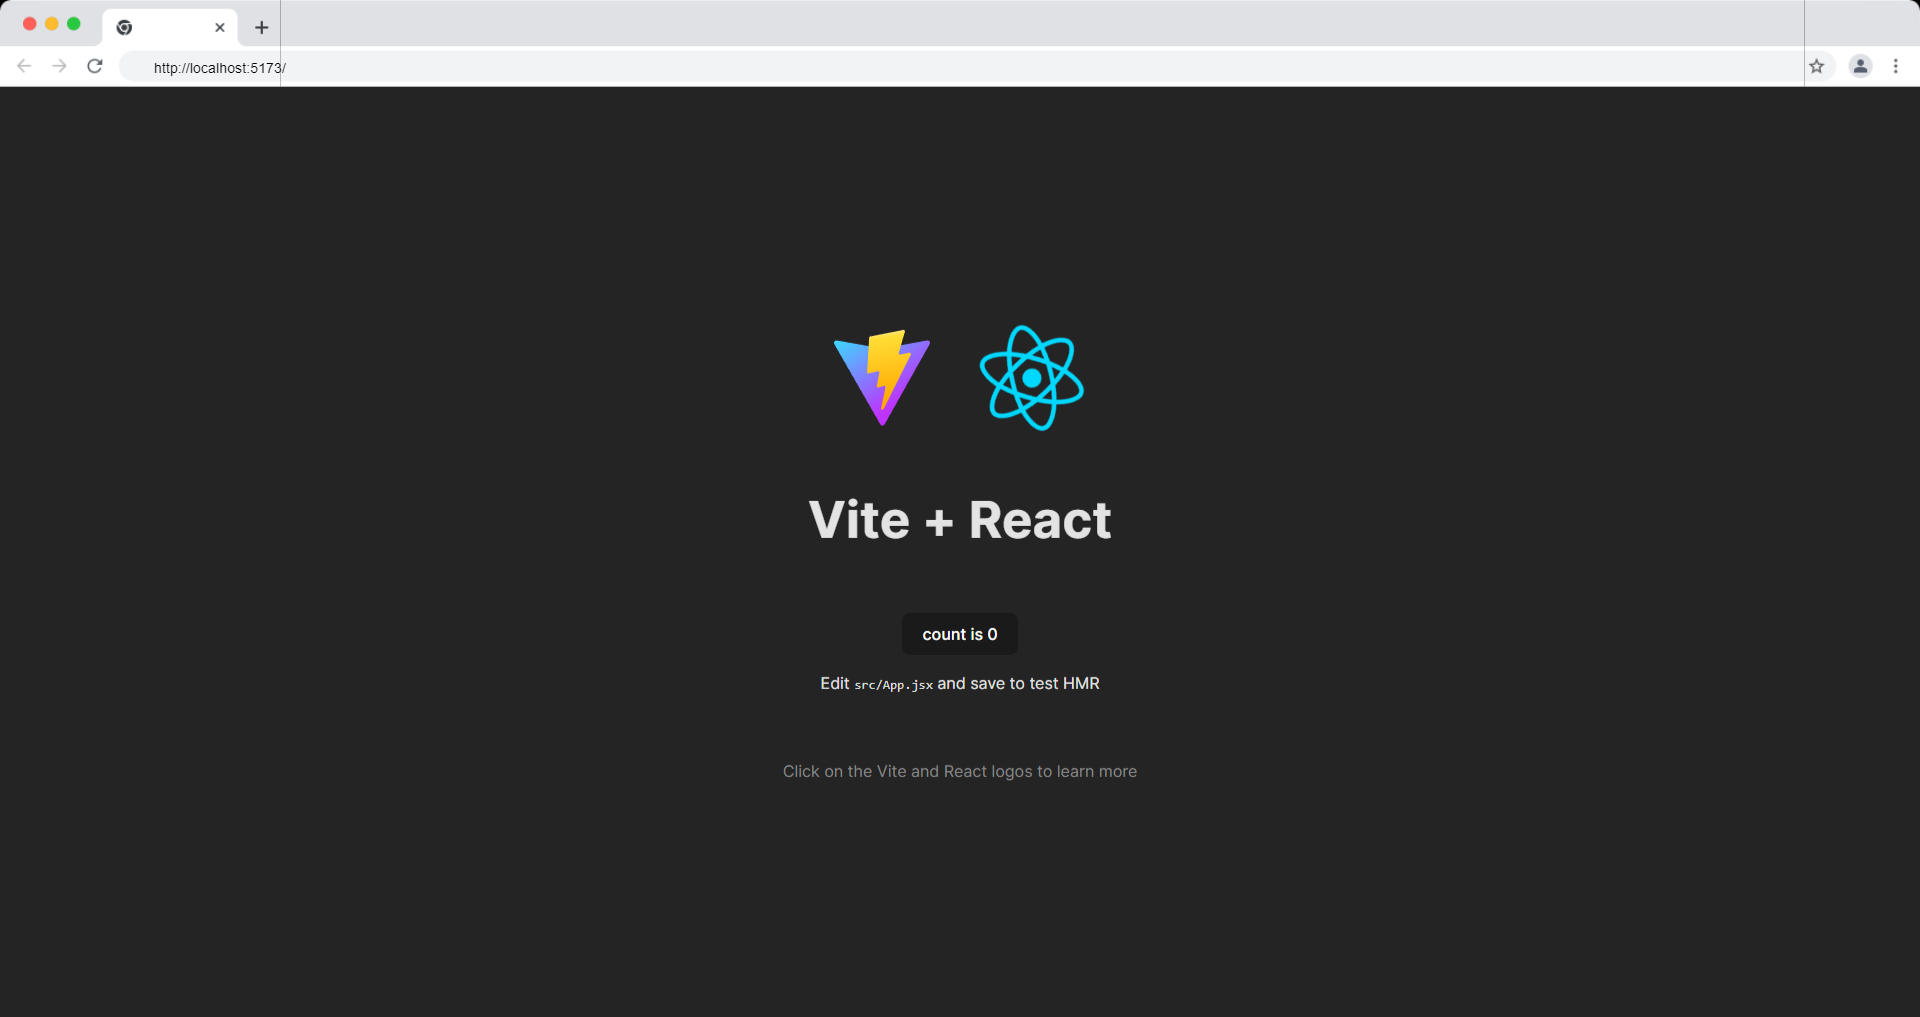

- Now, I will install a JavaScript library that will help in making HTTP requests. Here is the code that you will need:
npm install axios
- Next, I opened the folder my-blog-app in the Visual Studio code editor and deleted the folders that we wouldn’t need. From the left-hand side, you can see the folders and delete assets folder, index.css, and app.css.
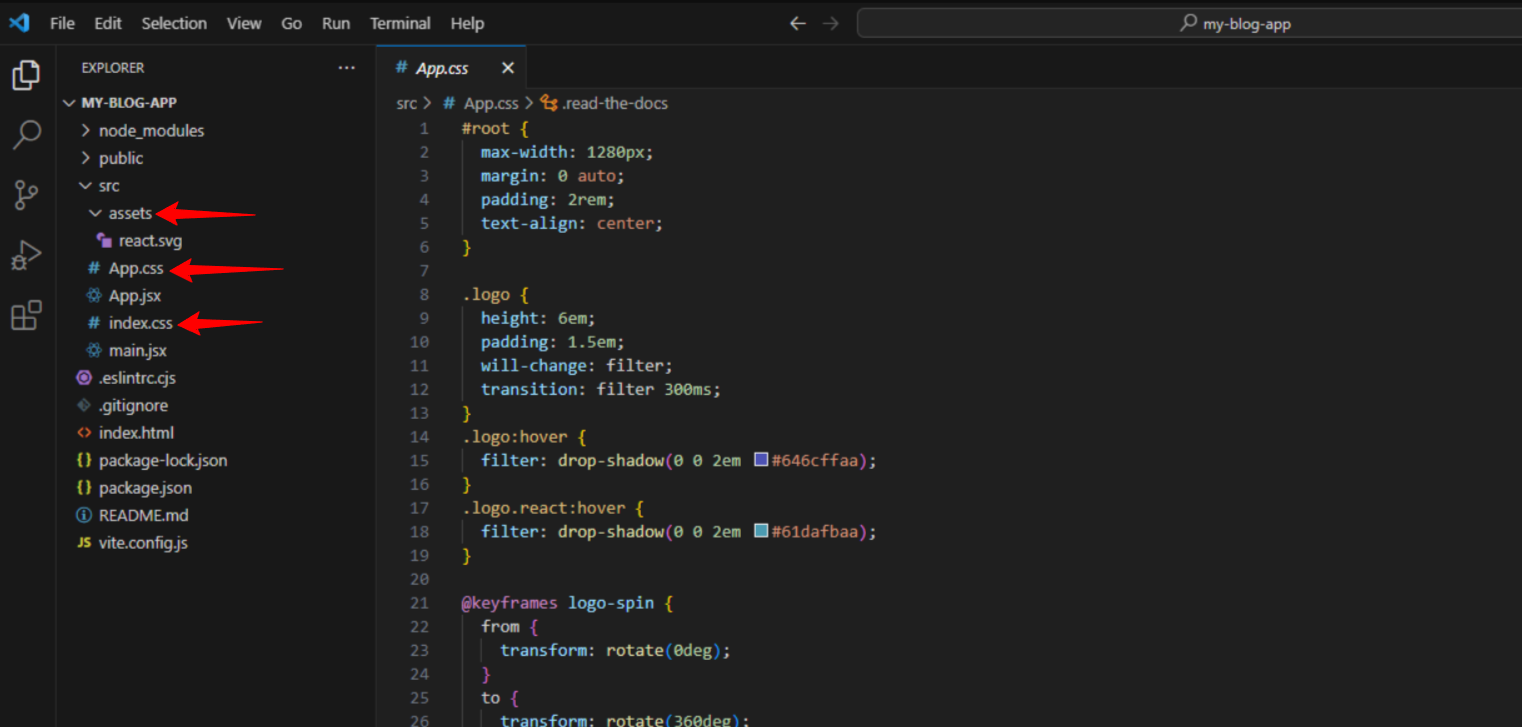

Then I’ve replaced the code inside the main.jsx and App.jsx and used the following code inside:
For main.jsx folder, use the code below:
// main.jsx
import React from 'react'
import ReactDOM from 'react-dom/client'
import App from './App'
ReactDOM.createRoot(document.getElementById('root')).render(
<React.StrictMode>
<App />
</React.StrictMode>,
)For App.jsx folder, use the code below:
// App.jsx

import React from 'react'

export default function App() {
  return (
    <App />
  )
}
The next step will be about fetching the posts from WordPress. So, let’s move on to that.
#3. Fetching Posts From WordPress
Now I will fetch the posts from our recently created WordPress website.
- Replace the existing content in your
App.jsxfile with the provided code snippet to incorporate the state usinguseStateAxios for fetching posts from the WordPress API. Adjust the API endpoint URL according to your WordPress setup. Here is the code to be placed in App.jsx
import React, { useState, useEffect } from 'react';
import axios from 'axios';

export default function App() {
  const [posts, setPosts] = useState([]);

  // Function to fetch posts from WordPress API
  const fetchPosts = () => {
    axios
      .get("http://headless-wordpress-website.local/wp-json/wp/v2/posts")
      .then((res) => {
        setPosts(res.data);
      })
      .catch((error) => {
        console.error('Error fetching posts:', error);
      });
  }

  // useEffect to call fetchPosts on component mount
  useEffect(() => {
    fetchPosts();
  }, []);
}
- The useState hook in React is a native feature that allows you to incorporate states within a component. A state essentially represents data or a property.
- In this context, ‘posts’ serves as a means to access information stored within the state, while ‘setPosts’ enables the addition of new data to the ‘posts’ state. Additionally, we’ve initialized the state with an empty array as the default value.
#4. Creating a Blog Component Locally
It is time to create a blog component using the following instructions:
- Navigate to the root directory of your project and create a new folder named components.
- Inside the components folder, create two files named blog.jsx and blog.css.
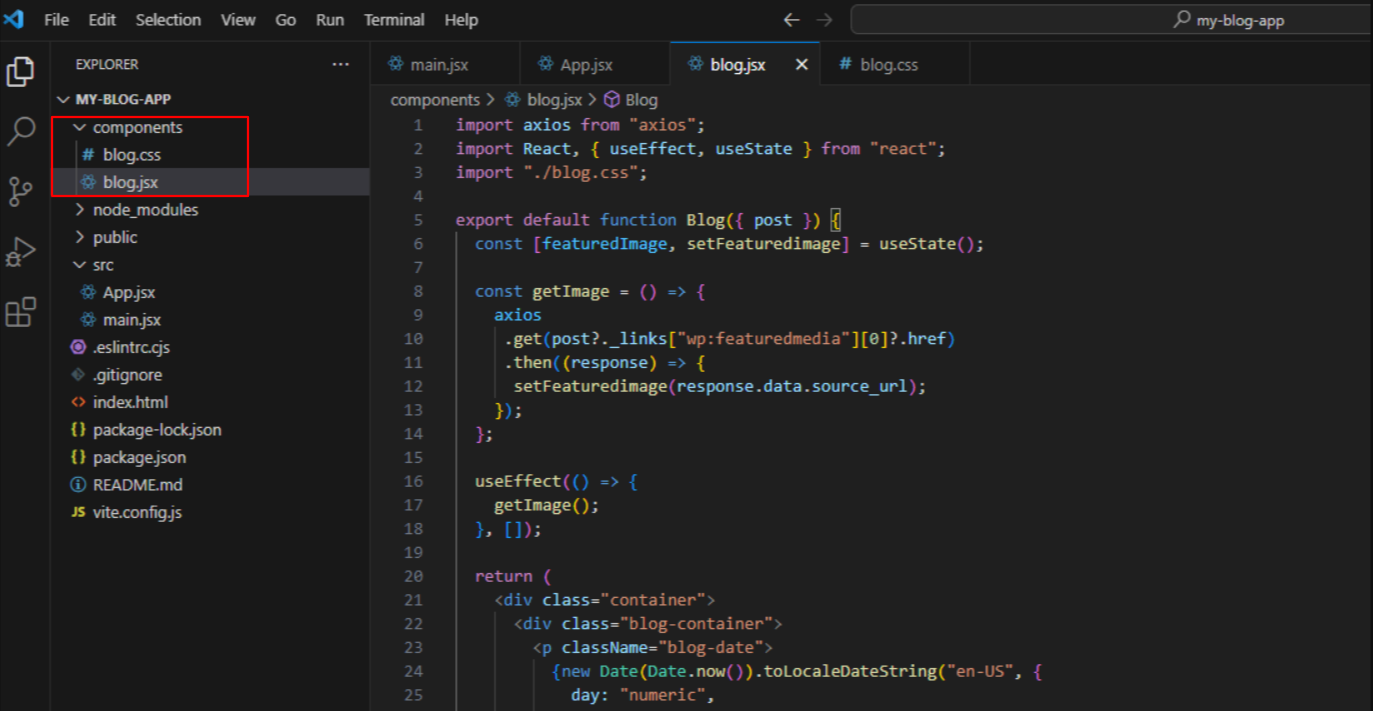

Add the code snippet to the blog.jsx file.
import axios from "axios";
import React, { useEffect, useState } from "react";
import "./blog.css";

export default function Blog({ post }) {
  const [featuredImage, setFeaturedimage] = useState();

  const getImage = () => {
    axios
     .get(post?._links["wp:featuredmedia"][0]?.href)
     .then((response) => {
      setFeaturedimage(response.data.source_url);
    });
  };

  useEffect(() => {
    getImage();
  }, []);

  return (
    <div class="container">
      <div class="blog-container">
        <p className="blog-date">
          {new Date(Date.now()).toLocaleDateString("en-US", {
            day: "numeric",
            month: "long",
            year: "numeric",
          })}
        </p>
        <h2 className="blog-title">{post.title.rendered}</h2>
        <p
          className="blog-excerpt"
          dangerouslySetInnerHTML={{ __html: post.excerpt.rendered }}
        />
        <img src={featuredImage} class="mask" />
      </div>
    </div>
  );
}- In the provided code snippet, a ‘card’ component has been crafted, designed to receive the ‘posts‘ property holding detailed information about a blog post fetched from the WordPress API.
- Within the ‘getImage()’ function, Axios is employed to retrieve the URL of the featured image, subsequently preserving this data within the component’s state.
- To ensure the ‘getImage()’ function is executed upon the component’s mounting, a useEffect hook has been integrated. This hook triggers the ‘getImage()’ function’s execution at the appropriate stage in the component’s lifecycle.
- Moreover, the ‘return’ statement has been included to present the post’s essential details, such as title, excerpt, and image within the component’s rendering logic.
- Now add the following code to the blog.css file:
@import url("https://fonts.googleapis.com/css?family=Poppins");

.blog-container {
  width: 400px;
  height: 322px;
  background: white;
  border-radius: 10px;
  box-shadow: 0px 20px 50px #d9dbdf;
  -webkit-transition: all 0.3s ease;
  -o-transition: all 0.3s ease;
  transition: all 0.3s ease;
}

img {
  width: 400px;
  height: 210px;
  object-fit: cover;
  overflow: hidden;
  z-index: 999;
  border-bottom-left-radius: 10px;
  border-bottom-right-radius: 10px;
}

.blog-title {
  margin: auto;
  text-align: left;
  padding-left: 22px;
  font-family: "Poppins";
  font-size: 22px;
}

.blog-date {
  text-align: justify;
  padding-left: 22px;
  padding-right: 22px;
  font-family: "Poppins";
  font-size: 12px;
  color: #c8c8c8;
  line-height: 18px;
  padding-top: 10px;
}

.blog-excerpt {
  text-align: justify;
  padding-left: 22px;
  padding-right: 22px;
  font-family: "Poppins";
  font-size: 12px;
  color: #8a8a8a;
  line-height: 18px;
  margin-bottom: 13px;
}
Head back to the App.jsx file, and add the following code within the return statement. This will help in rendering and displaying the blog component.
return (
    <div>
    {posts.map((item) => (
      <Blog post={item} />
    ))}
  </div>
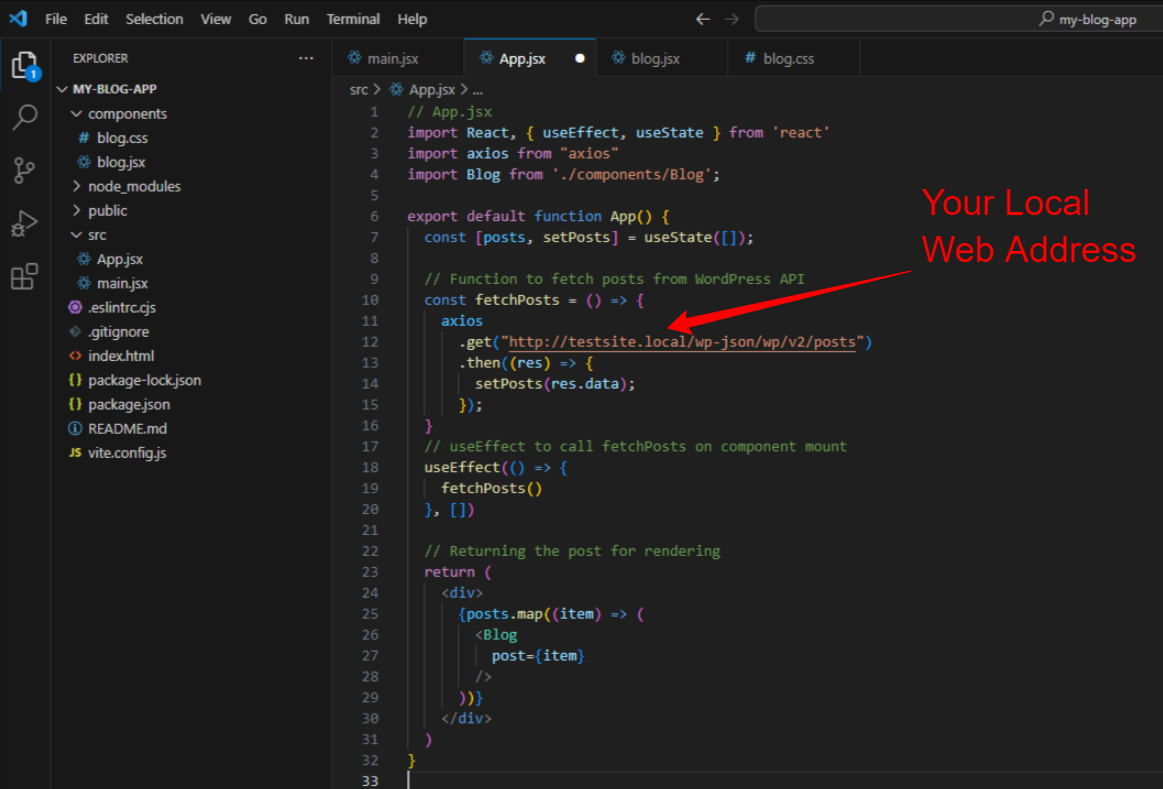
);- So ultimately, your App.jsx should contain the following codes:
import React, { useEffect, useState } from 'react'
import axios from "axios"
import Blog from './components/Blog';

export default function App() {
  const [posts, setPosts] = useState([]);

  const fetchPosts = () => {
    axios
      .get("http://my-awesome-website.local/wp-json/wp/v2/posts")
      .then((res) => {
        setPosts(res.data);
      });
  }

  useEffect(() => {
    fetchPosts()
  }, [])

  return (
    <div>
      {posts.map((item) => (
        <Blog
          post={item}
        />
      ))}
    </div>
  )
}

Now, save this file, open the terminal on your code editor, and run the following code again.
npm run devOpen the the address on your browser but keep in mind that your WordPress website should be running locally.
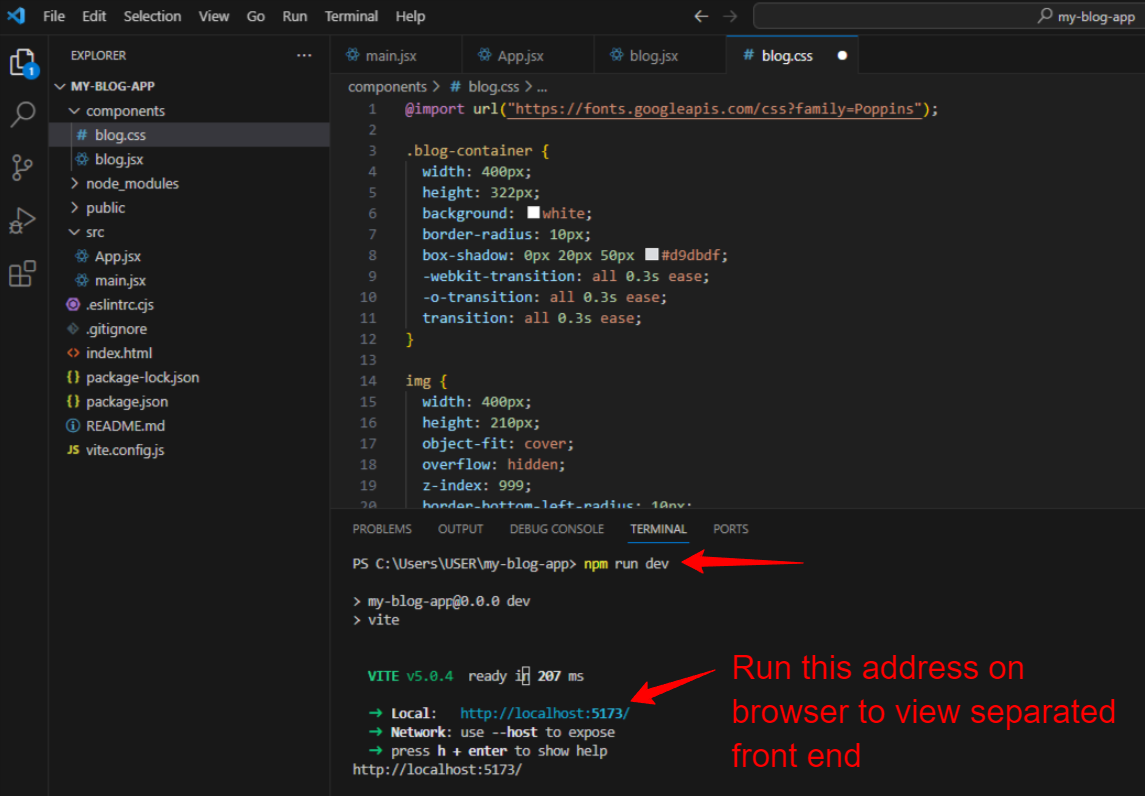

Go to the address on your terminal and view the fetched post from your WordPress site, which is rendered via React.
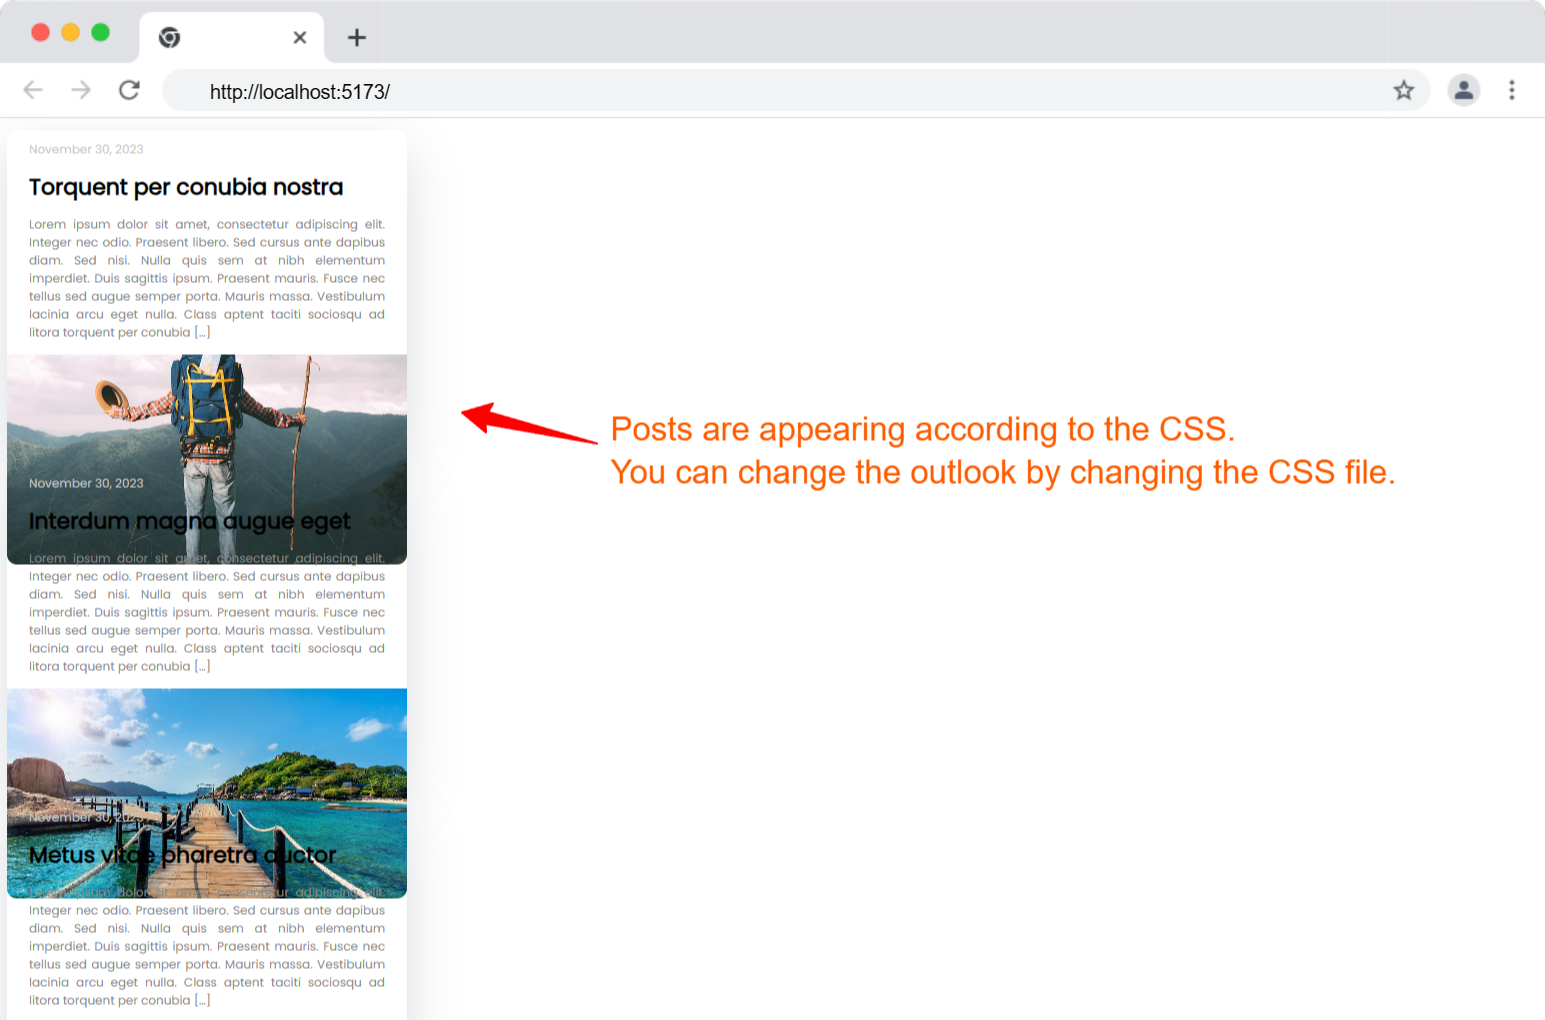

- The posts rendered on the separated front end will look like this, but you can change the outlook at any time. I’ve changed the blog.css file a built more with the following CSS code:
/* Import Google Font */
@import url("https://fonts.googleapis.com/css?family=Poppins:400,700&display=swap");

/* Basic reset and default styles */
body {
  margin: 0;
  padding: 0;
  font-family: "Poppins", sans-serif;
  font-size: 16px;
  line-height: 1.6;
  color: #333;
  background-color: #f9f9f9;
}

/* Container for the blog post */
.blog-container {
  width: 100%;
  max-width: 800px;
  margin: 20px auto;
  background: #fff;
  border-radius: 10px;
  box-shadow: 0 20px 50px rgba(0, 0, 0, 0.1);
  transition: all 0.3s ease;
  overflow: hidden;
}

/* Blog post image */
img {
  width: 100%;
  height: 300px;
  object-fit: cover;
  border-bottom-left-radius: 10px;
  border-bottom-right-radius: 10px;
}

/* Blog title */
.blog-title {
  padding: 20px;
  font-size: 28px;
  font-weight: 700;
  color: #333;
}

/* Blog date */
.blog-date {
  padding: 0 20px;
  font-size: 14px;
  color: #777;
}

/* Blog excerpt or content */
.blog-content {
  padding: 20px;
  font-size: 16px;
  line-height: 1.8;
  color: #555;
}
Now refresh the browser and here is how it looks with a bit changed outlook.
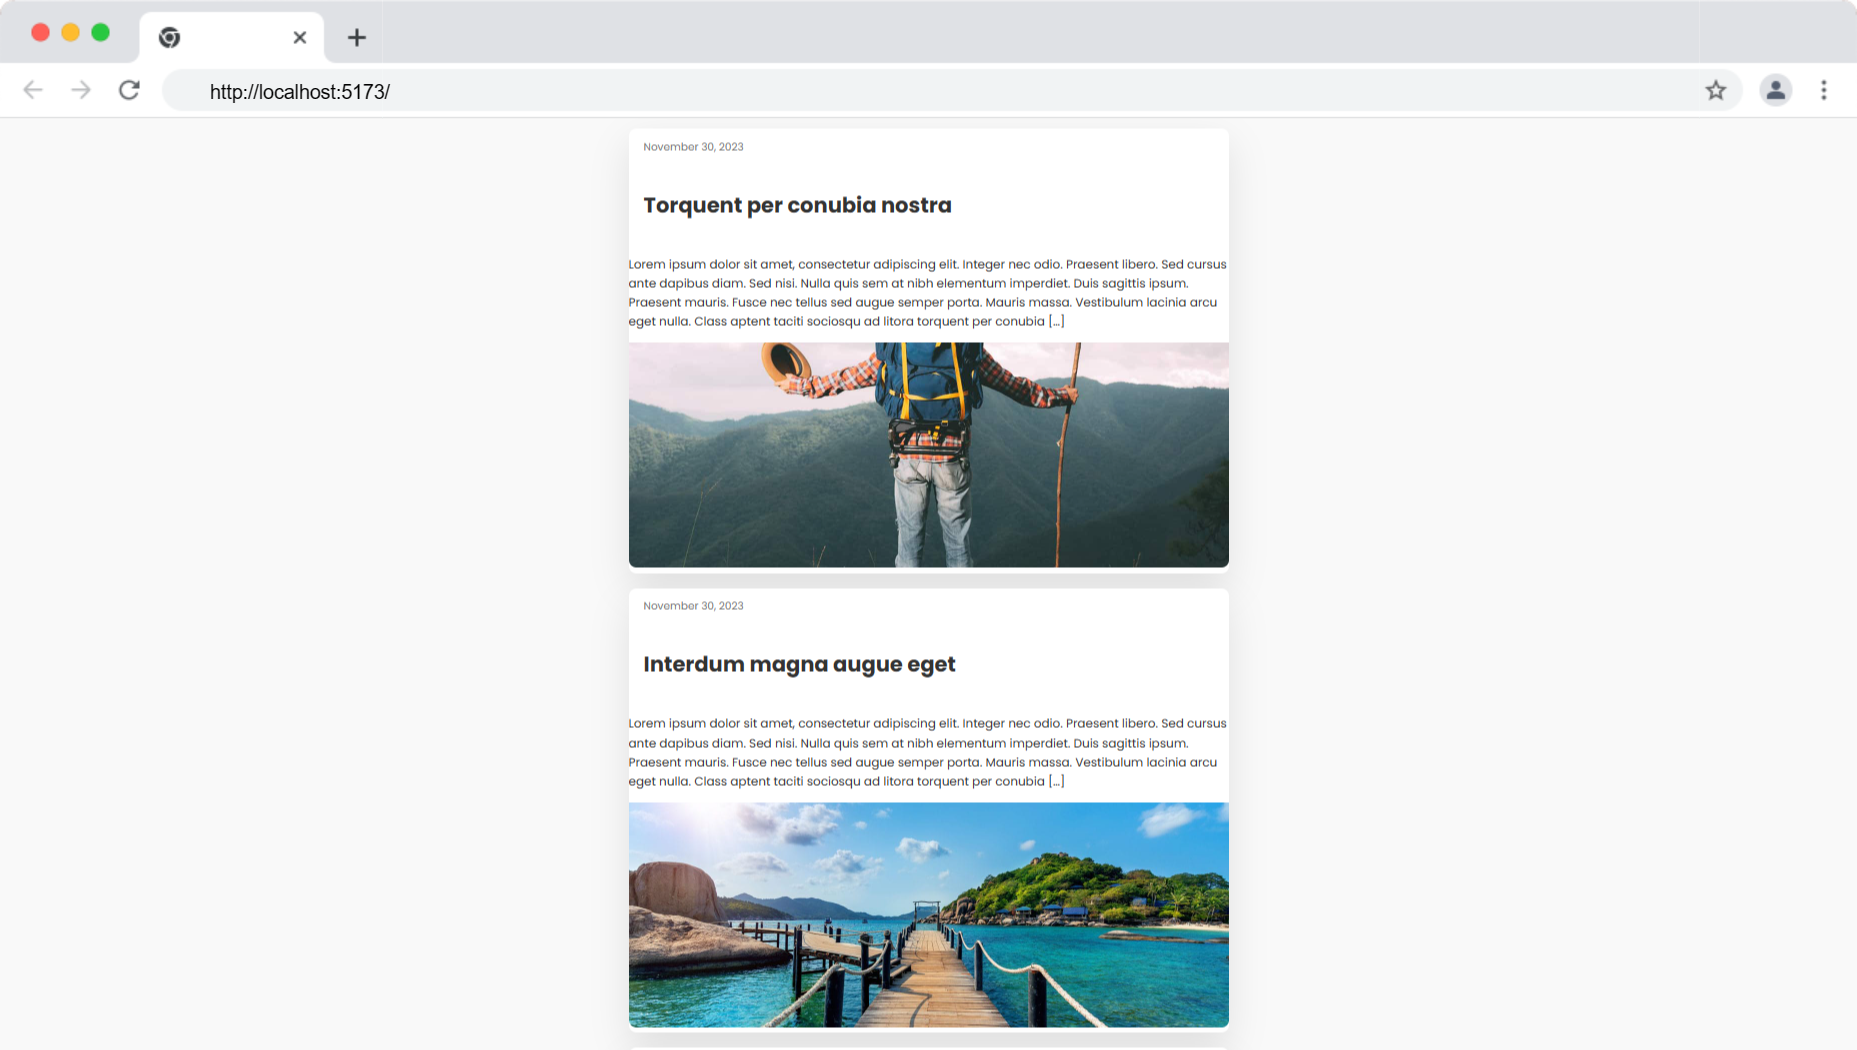

If you are still following, your WordPress Headless website will be up and running successfully in the local development environment. When you are satisfied with the output after creating all the front-end components, fetching data, and displaying it in the front end, deploy your site online.
Final Thoughts
WordPress CMS is already full of features and customizability that meet a wide range of business needs. Yet, with the change of different trends and technologies, individuals and businesses may want to explore other options that provide more flexibility and scalability. This is where the headless CMS approach can help with a separate back end and front end.
But you must keep in mind that there are some flaws of this approach that your business might not afford to consider. This approach requires an expert development team or individual with proper website-building experience.
The overall maintenance involves more cost compared to the traditional approach. Moreover, this is not ideal for those willing to publish a lot of content on the site. So, before moving into a headless WordPress CMS, you must consider your business objectives and the expertise your team contains.
Si quiere puede hacernos una donación por el trabajo que hacemos, lo apreciaremos mucho.
Direcciones de Billetera:
- BTC: 14xsuQRtT3Abek4zgDWZxJXs9VRdwxyPUS
- USDT: TQmV9FyrcpeaZMro3M1yeEHnNjv7xKZDNe
- BNB: 0x2fdb9034507b6d505d351a6f59d877040d0edb0f
- DOGE: D5SZesmFQGYVkE5trYYLF8hNPBgXgYcmrx
También puede seguirnos en nuestras Redes sociales para mantenerse al tanto de los últimos post de la web:
- Telegram
Disclaimer: En Cryptoshitcompra.com no nos hacemos responsables de ninguna inversión de ningún visitante, nosotros simplemente damos información sobre Tokens, juegos NFT y criptomonedas, no recomendamos inversiones

