

I have always admired Windows for its continuous commitment to making technology more accessible for individuals with disabilities. I mean, the narrator in Windows was introduced in the year 2000, far before smartphones became the go-to assistants.

Over the years, Windows has consistently enhanced its accessibility features, ensuring that individuals with visual impairments, hearing difficulties, limited mobility, or partial disabilities can effectively use a computer.
If you have any kind of disability that makes it difficult to use a PC, there is a good chance there is an accessibility option to make things easier for you.
In this post, I’ll tell you everything you need to know about accessibility options in Windows 11, as well as other essential settings and apps designed to assist individuals with disabilities.
Windows 11 Accessibility Options
All the options that can help people with disabilities are neatly listed in a dedicated section in Windows. Just go to Settings and click on the Accessibility option in the left panel. This will open all the options that can help people with disabilities.
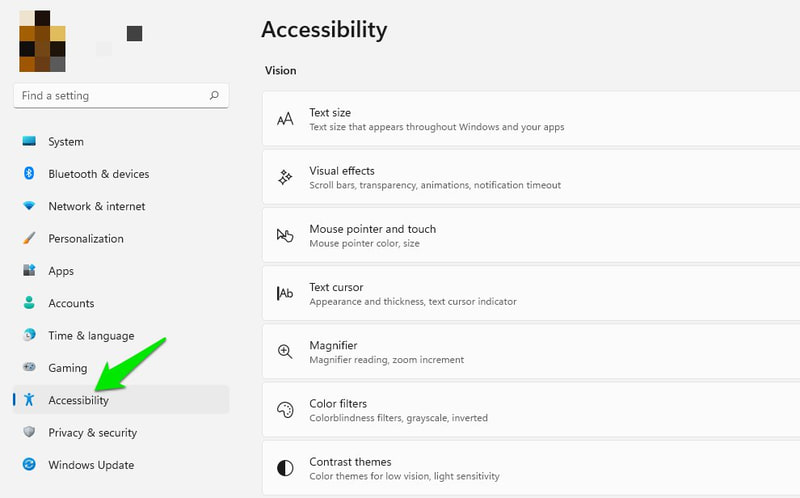
Most of the options I’ll talk about will be listed under the Accessibility section. However, there are some other options in the Settings that can indirectly help disabled people. I’ll mention them too and provide exact instructions to access them.
Accessibility Options for the Visually Impaired
For the visually impaired or blind people, Windows has a bunch of accessibility options that can either make it easy to view content or even use the PC using speech input and audio feedback. Below you’ll find all the Windows accessibility options that can help the visually impaired:
#1. Text size
If you are farsighted or have cataracts, then reading on your PC can be difficult, especially with smaller text. You can increase the size of the text in Windows, and it will automatically resize the text on all apps.

Using the slider, you can increase the size of the text up to 225%. The size also affects the UI of each app, so you may see less area of apps on the screen at a time. Some apps may become unusable if you increase the size too much.
#2. Configure Mouse Pointer
People with visual field defects like glaucoma or retinitis pigmentosa can have trouble keeping track of the mouse pointer. Thankfully, you can increase the pointer’s size and change its color to make things better.
In the Mouse pointer and touch option, you can either choose a custom color or make the pointer invert colors in real-time based on what color it’s hovering on. The inverted color option is especially useful as it will never let the pointer blend in with other colors.
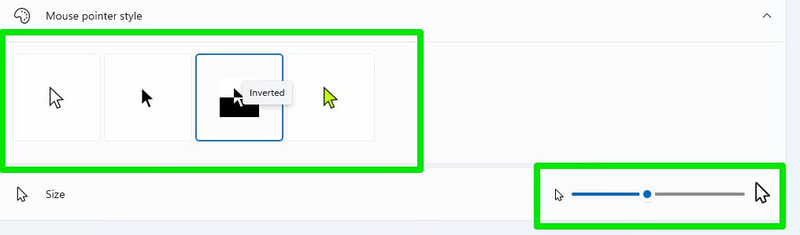
You can also make the pointer size really big using the slider, which will ensure you never have trouble finding it.
#3. Text cursor
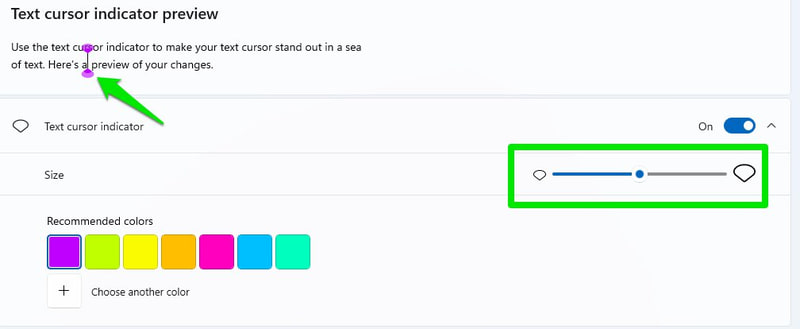
The text cursor is also something people with visual field defects can have trouble keeping track of. In the accessibility option, you can add a text cursor indicator that will point out the text cursor using your preferred color.
The indicator will add two round pointers at both ends of the text cursor to easily distinguish. You can select the color and size of these pointers as you like.
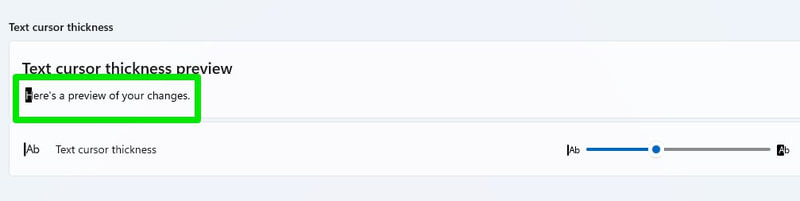
If you scroll down, there is also an option to increase the thickness of the text cursor itself. Although though, keep in mind that these changes may not work in all the apps with text fields.
#4. Magnifier
The magnifier option helps you view specific content easily by zooming in on it by up to 1600%. Although it can be manually enabled from these Magnifier settings, it’s better to use the keyboard shortcut for it.
You can press Windows+Plus (+) keys on the keyboard to turn on the magnifier and then zoom out or in using Windows+Minus(-) or Plus (+) keys.
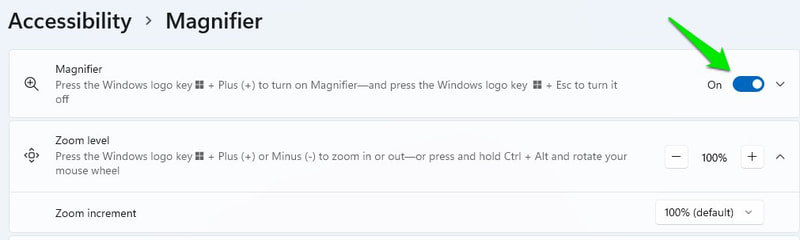
More importantly, the magnifier has the narrator function built-in (more on it later). You can use it to speak aloud the button or text you click on. The buttons to use the narrator are on the magnifier pop-up.

If you scroll down, there is also Invert colors option that will invert all colors when you’ll turn on the magnifier.
#5. Color Filters
Windows has dedicated color filters to help people with color blindness. Whether you have deuteranopia, protanopia, or tritanopia, Windows can automatically adjust colors to make it easier to differentiate between them. You just need to select the right color filter, and it will automatically apply to all apps and Windows functions.
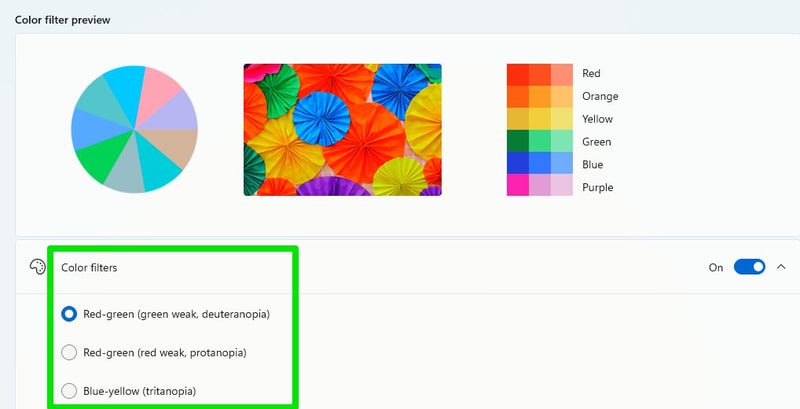
For people with more severe color blindness, such as Achromatopsia, the Grayscale option can keep things consistent.
#6. Contrast themes
People with photophobia, cataracts, low vision, and some age-related vision issues can greatly benefit from high-contrast themes. Windows offers multiple contrast themes you can choose from. Not only that, you can fully edit each theme to suit your style, including the color of the background, text, link text, highlighter, and more.

#7. Narrator
The narrator is Windows built-in screen reader that narrates everything on your screen with a focus on exactly what you click on. It can be very useful for people with very low vision or who are blind.
You can refer to this guide by Microsoft to learn everything about the narrator. Although, in the accessibility options, you can customize the behavior that I will be talking about. First, make sure the keyboard shortcut to turn on the narrator is enabled. It will let you easily turn on/off the narrator when needed.

There are many settings to adjust here, but the narrator’s voice and verbosity are the main ones. In the voice settings, you can choose your narrator’s voice and accent, speed, pitch, and volume. Adjust these options according to what you find comfortable.
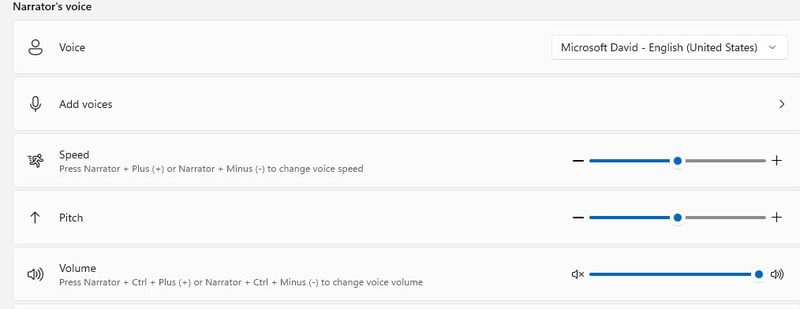
The verbosity option is where you decide how much help you need from the narrator. You can select whether you want it to read everything in detail and provide context, only read text, or read text and buttons. Here you can also configure what the narrator should read aloud when you type.

If you want a bit more advanced screen reader, then you can also try a third-party app like NVDA or JAWS. They usually have better features, especially when it comes to interacting with documents and typing.
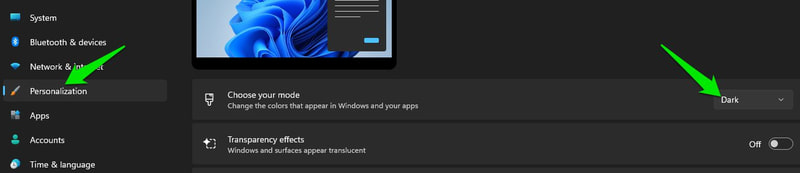
#8. Dark Mode and Night Light
For people with eyes sensitive to light, the dark mode and night light feature can be very useful. The dark mode will turn the Windows background and supported apps UI to black color to minimize bright light. The night light feature reduces blue light emission to minimize eye strain.
Both of these options are not available under the accessibility option, but you can enable them in Settings.
To enable dark mode, go to Personalization > Colors > Choose your mode.
To enable night light, go to System > Display > Night light.

Accessibility Options for the Hearing Impaired
Deaf or hard-of-hearing people usually don’t have much trouble when it comes to using a Windows PC, but there are still some types of content out of their reach. For example, they can have trouble talking to others over a video call or listening to audio speech without subtitles.
Thankfully, Windows has a few tricks up its sleeve, so you can participate in these activities even if you are deaf. Let’s check some of the accessibility features of Windows that can help hearing-impaired individuals.
#1. Mono Audio
If you have hearing impairment in one ear, then you should enable mono audio in the Audio accessibility option. It will make the sound process through a single channel, so no matter from which ear you hear it, it will be the same. There isn’t much else to it, just open the Audio option and enable the Mono audio toggle.

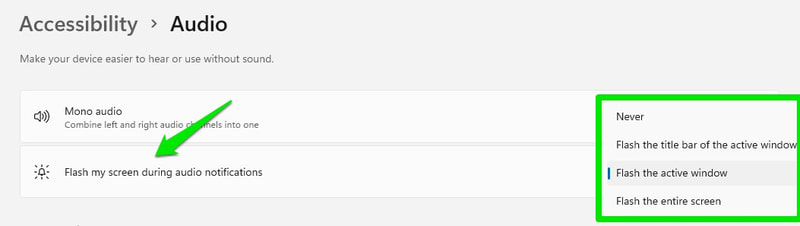
#2. Flash Screen for Notifications
You can make Windows flash the screen or the currently active window when a notification arrives. This is a great way to keep up with notifications without needing to depend on audio alerts.
In the same Audio accessibility option, there is a Flash my screen during audio notifications option where you can select what part of the screen should be flashed to notify you.
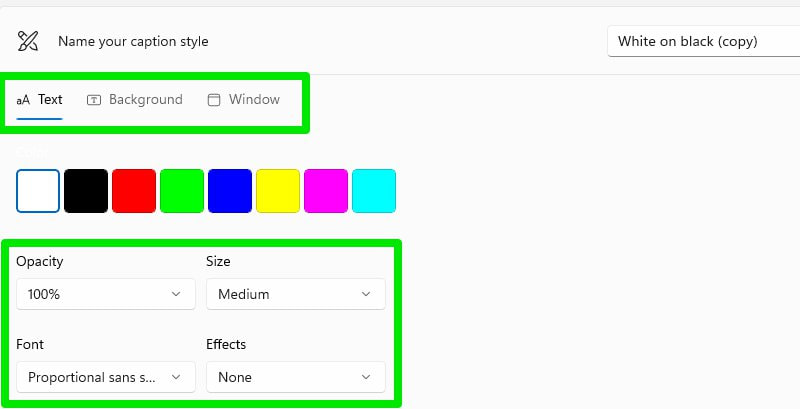
#3. Captions
Windows can use speech-to-text to convert all audio speech to text and show them as floating captions on the screen. So whether you are on a call or watching a video on your favorite website, Windows will transcribe the audio in real-time and show you what is being said.
Of course, the translation won’t be perfect, but it will be good enough to understand the context. To use the captions feature, you must have the latest Windows 11 22H2 version. You can press Windows+Ctrl+L key combination to turn on/off the feature, and it will automatically transcribe audio speech when heard.
In the Captions accessibility option, you can customize how the caption will display. This includes its color, background, opacity, size, font, etc.
You can also try some transcription apps that might be a good alternative to Windows live captions, at least for audio files.
#4. Volume Booster App
If you have weak hearing and your current sound system isn’t loud enough to clearly listen to audio, then a sound booster app might help. Letasoft Sound Booster is my favorite for this purpose. It can boost the sound up to 500%, but that will also distort the sound, so avoid maximum boost.
Alternatively, FxSound is also a good option if you want to be a little fancy with equalizer and stuff. I’ll also recommend you try using headphones; as someone with tinnitus, they greatly help me with focusing on audio from my PC only.
Accessibility Options For The Mobility Impaired
Mobility disabilities like paralysis, cerebral palsy, RIS, arthritis, and Parkinson’s disease can limit a person’s use of Windows PC. You might have trouble using input devices like the mouse or keyboard or may not even be able to interact with the PC at all.
Windows accessibility options make it a little easier to use the input devices and even use the PC using voice or an eye tracker. Let’s check out these handy options:
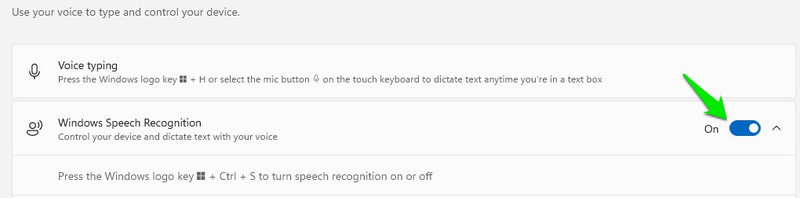
#1. Speech Recognition
This can be a great way to use Windows PC for both mobility challenged and visually impaired. With speech recognition, you can not only dictate messages and documents but also fully control the PC with voice.
You can open apps, perform file explorer tasks, control mouse movement, enter keyboard key combinations, dictate with punctuation, and a lot more with voice. Here’s a list of all the commands you can use to control your Windows PC with voice.
You can turn on Windows Speech Recognition in this accessibility setting. Although using the Windws+Ctrl+S shortcut is a much better option if you can comfortably use the keyboard.
Combing this with the narrator feature, you can fully control the PC hands-free without needing to look at the screen.
#2. Keyboard
There are a bunch of keyboard-related options that can make it easier to use the keyboard. Sticky keys and Filter keys are two options that can help people with mobility problems to use the keyboard.

Sticky keys let you perform key combinations one key at a time, and Filter keys prevent multiple keystrokes from registering. You can click on each option to further customize your preferences.
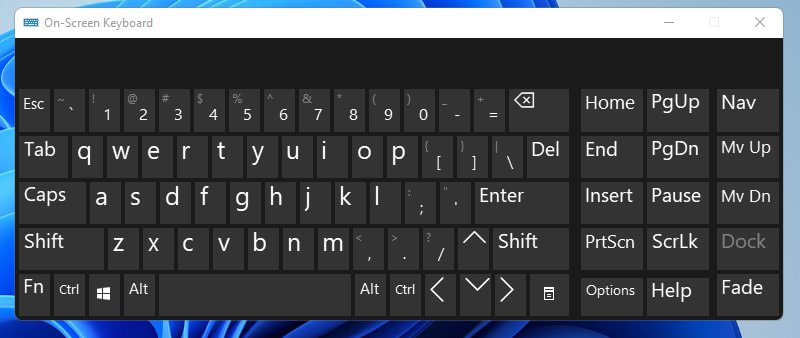
If you scroll down a bit, you’ll see the On-screen keyboard option that will open a virtual keyboard that you can use with a mouse. If you can only use the mouse, then it’s a good way to use keyboard functions without a physical keyboard.
Although if you can access the keyboard, then using the Windows+Ctrl+O keyboard shortcut is better for launching the virtual keyboard.
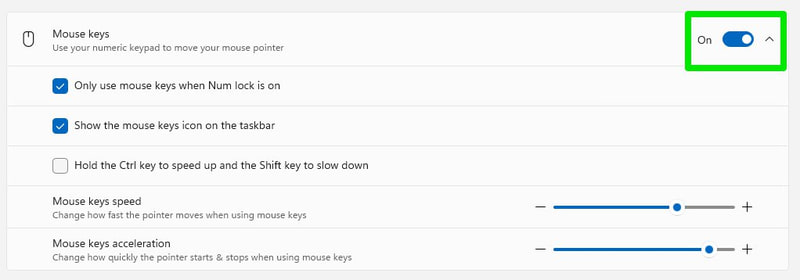
#3. Mouse
Many wrist-related disabilities can prevent you from using the mouse. If you can still use the keyboard, then you can enable Mouse keys to control the mouse using the numeric keypad. Here you can enable mouse keys and also increase/decrease mouse movement speed.
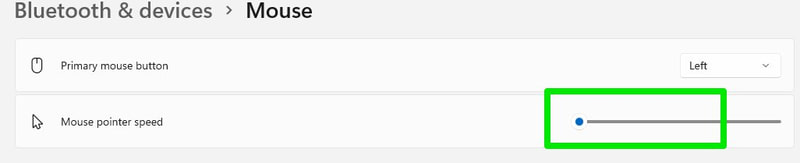
#4. Decrease Mouse Speed
If a disability leads to shaky hands, then decreasing the mouse pointer speed can help increase precision. However, you’ll have to physically move around the mouse more for cursor movement.
To manage mouse speed, go to Bluetooth & devices > Mouse in Settings and adjust the Mouse pointer speed option here.
#5. Eye Control
This option basically lets you connect your eye tracker with Windows so you can control it with eye and head movement. With an eye tracker like Tobii Eye Tracker, you can not only control Windows; you can even play complex games. Here’s a guide by Microsoft to learn to set up and use an eye tracker with Windows.
 cryptoshitcompra.com/wp-content/uploads/2023/06/1686308065_419_Guide-To-Make-Windows-11-Easier-To-Use-For-Disabled.jpg»/>
Ending Thoughts 👨💻
Windows offers comprehensive accessibility options to let everyone use a PC. I am sure you won’t have to look for any third-party tools to get help with whatever disability you may have. I personally think it would have been cool if Microsoft added something for people with speech impairment as well, like the many such apps available for smartphones.
Si quiere puede hacernos una donación por el trabajo que hacemos, lo apreciaremos mucho.
Direcciones de Billetera:
- BTC: 14xsuQRtT3Abek4zgDWZxJXs9VRdwxyPUS
- USDT: TQmV9FyrcpeaZMro3M1yeEHnNjv7xKZDNe
- BNB: 0x2fdb9034507b6d505d351a6f59d877040d0edb0f
- DOGE: D5SZesmFQGYVkE5trYYLF8hNPBgXgYcmrx
También puede seguirnos en nuestras Redes sociales para mantenerse al tanto de los últimos post de la web:
- Telegram
Disclaimer: En Cryptoshitcompra.com no nos hacemos responsables de ninguna inversión de ningún visitante, nosotros simplemente damos información sobre Tokens, juegos NFT y criptomonedas, no recomendamos inversiones