
TensorFlow is an open-source platform developed by Google for machine learning and AI (artificial intelligence). It helps with a range of tasks for developers working in that field.
For starters, you need to have an understanding of machine learning or, specifically, deep learning before you can make use of TensorFlow.
Here, let me highlight a few things about TensorFlow, its features, and quick methods to install it on Windows and Linux.
TensorFlow Overview

Technically, TensorFlow is an open-source platform that helps with deep learning applications and any other machine learning use-cases.
It makes things easy to build and deploy ML-powered applications. If you want to solve a problem using machine learning, you can get help with TensorFlow.
TensorFlow provides tools to help develop and train models using Python or JavaScript. While I’m not a developer, you can explore its documentation to know how it affects your workflow of deploying a machine learning application.
Features of TensorFlow
 cryptoshitcompra.com/wp-content/uploads/2022/08/How-to-Download-Install-and-Setup-Tensorflow-on-Windows-and.jpg» alt=»YouTube video» width=»480″ height=»360″ data-pin-nopin=»true»/>
TensorFlow is famous for several reasons, and you can evaluate that for yourself, knowing its best feature offerings.
If we get to discuss the technical benefits, you will have to compare them for what you do. So, we will focus on common features beneficial for most.
1. Open Source
Google decided to open-source TensorFlow in 2015 to allow the community to improve it further and provide transparency on how it works.
Developers can customize the library in various ways to solve problems you may not have expected.
Without an open-source framework, it may not have been as popular as it is. Hence
2. Easy Debugging
TensorFlow aims to help you with easy model building; hence, an effortless debugging experience is a part of that process.
The intuitive user experience is a cherry on top of it.
3. Supports Both CPUs and GPUs
With TensorFlow, you get the ability to train the data computation on a CPU or the GPU. Usually, a GPU makes things faster for deep learning applications compared to the CPU.
So, if you have a powerful GPU in your arsenal, TensorFlow can help you make the most out of it.
4. Useful Machine Learning APIs
APIs help developers integrate a variety of features into their applications. And TensorFlow provides access to a good collection of stable APIs.
Some of them may offer performance advantages as well. As per its official claims, you should not have a problem with the ones available in Python. If you are working with other languages, you need to check with the TensorFlow maintainers how good they are for your use case.
5. Ready-Made Models for Production
TensorFlow features a variety of pre-trained models. Whether a professional or a newbie, you can use those to save time and build ML models faster.
In addition to these features, you get flexibility, ease of use, a visualization toolkit, and more that can aid your machine learning development workflow.
Now that you have a good idea about TensorFlow, where can you download it? How to install it and set it up on your Windows and Linux systems?
Let us discuss that below.
Downloading and Installing TensorFlow
Unlike other programs, you do not get a .exe setup file here. Primarily, you will need to download the package using the recommended package manager.
Overall, there are different ways of installation. We can list them as follows:
- Using Miniconda and pip
- Using Miniconda and pip on WSL 2
- Using a Docker container
- Building from sources
How to Install TensorFlow on Windows?

Unlike other programs, you do not get a .exe setup file here. You will need to download the package using the recommended package manager.
#1. Using Miniconda and pip (Recommended Method)
Note: At the time of writing this, TensorFlow 2.10 is the last version to support GPU on Windows (natively). If you work with newer packages, TensorFlow recommends you install TensorFlow in WSL 2, which will be discussed next.
If you want to use TensorFlow with GPU support, TensorFlow recommends using Miniconda (installer for conda package manager) to kick things off.
With Miniconda, you get to create a separate environment to avoid conflict with any other software in your system.
To get started, you need to download the latest Miniconda Windows Installer and follow the on-screen instructions to complete the installation.
Once done, you need to launch the Miniconda prompt as shown in the screenshot:
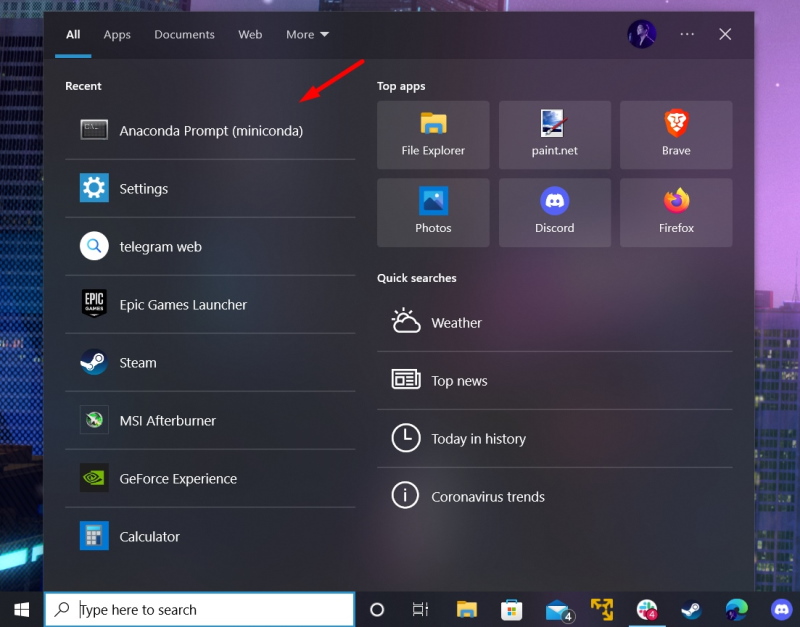
Here’s what it looks like:

After you see the Anaconda prompt window, you might want to type in the following command to make sure the conda package manager has been updated:
<strong>conda update -n base -c defaults conda</strong>With that out of the way, here are the steps you need to follow to install TensorFlow:
First, to create a new environment (with the name tf):
<strong>conda create --name tf python=3.9 </strong>Tip: You can activate/deactivate it by using the commands: conda activate tf and conda deactivate
You will have to activate it to proceed further. To enable GPU support in the process, you must make sure that you have your graphics driver (NVIDIA GPU) installed, and then install a few packages using the following command:
<strong>conda install -c conda-forge cudatoolkit=11.2 cudnn=8.1.0</strong>It downloads about 1 Gigs of packages, which include tools enabling you to deploy machine learning applications with GPU and a deep neural network.
Finally, you will have to utilize the pip package manager to install the TensorFlow package. You can choose to use conda to install Tensorflow, but it may not have the latest stable version needed.
Before proceeding, ensure that pip has been updated using the command:
pip install --upgrade pipOnce done, install TensorFlow with:
<strong>pip install tensorflow</strong>
You will notice numerous packages being built/installed. It could appear as stuck in the process, but give it a minute, and it should resume and complete the installation.

#2. Using Conda and pip on WSL 2
Assuming you already have WSL 2 setup on your system, you can install TensorFlow using the following commands in the distribution’s terminal:
conda install -c conda-forge cudatoolkit=11.2 cudnn=8.1.0
export LD_LIBRARY_PATH=$LD_LIBRARY_PATH:$CONDA_PREFIX/lib/

python3 -m pip install tensorflow

# Verify install:

python3 -c "import tensorflow as tf; print(tf.config.list_physical_devices('GPU'))"
You can paste it all at once, and it will be processed one by one.
In case you haven’t installed WSL 2 on Windows. Head to the command prompt with administrator access, and then type in the following:
wsl.exe --installIt should download Ubuntu and enable the WSL feature for your system. You will need to reboot your PC for it to complete.
If you cannot find Ubuntu on your system, you can navigate to the Microsoft Store and install Ubuntu WSL.

#3. Build From Source
Considering TensorFlow is open-source, you can build it from the ground up with your configuration options.
Hence, this is recommended for advanced users aware of all the options and who know the nuts and bolts to configure. Refer to the official documentation to explore more about it.
How to Install TensorFlow on Linux?

Like Windows, you can install TensorFlow using Miniconda and pip on Linux. Or choose to build from the source.
Let me show you how it’s done:
#1. Using Miniconda and pip (Recommended Method)
Note: Follow the same commands as Windows. The only difference is how you install/download Miniconda on Linux.
Here’s how to install Miniconda on Linux using the terminal:
curl https://repo.anaconda.com/miniconda/Miniconda3-latest-Linux-x86_64.sh -o Miniconda3-latest-Linux-x86_64.sh

bash Miniconda3-latest-Linux-x86_64.sh
Restart the terminal on your Linux distribution to find something like this:
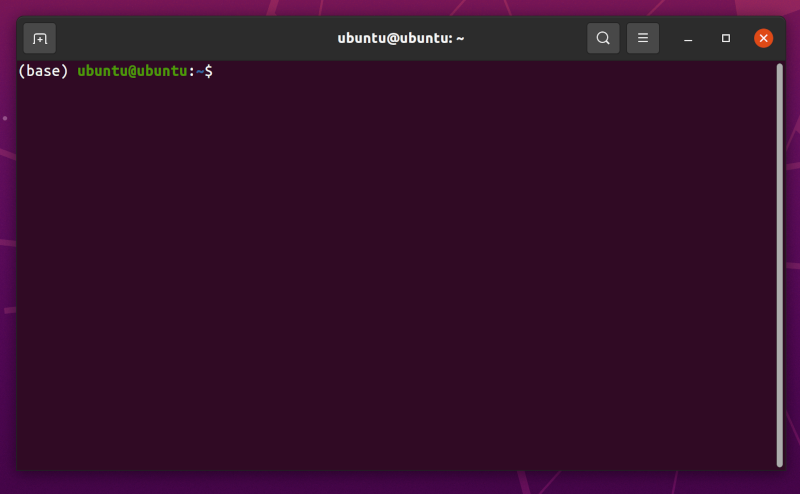
You will notice a (base) before the terminal prompt variables. This indicates that conda is currently active and installed.
Do not deactivate it unless you’re done with TensorFlow installation.
You can navigate to the steps mentioned above for Windows and get it installed. Or, paste the following to install TensorFlow:
conda install -c conda-forge cudatoolkit=11.2 cudnn=8.1.0
export LD_LIBRARY_PATH=$LD_LIBRARY_PATH:$CONDA_PREFIX/lib/
python3 -m pip install tensorflow
# Verify install:
python3 -c "import tensorflow as tf; print(tf.config.list_physical_devices('GPU'))"
With Linux, you may have issues with the GPU driver. For that, you should look at NVIDIA’s documentation to learn more.
#2. Build from Source
Like Windows, building from the source code is tricky on Linux and purely meant for advanced users.
You (assuming you are a beginner) should not opt for this method unless you have something specific in mind. The best way to explore more about it is to refer to the documentation.
How to Install TensorFlow Using Docker? (Windows and Linux)
Regardless of the platform, Docker lets you install TensorFlow images without hiccups.
Make sure you have Docker installed on your system, or you can follow our Docker installation guide for help.
Once done setting it up, you need to enter the following command from within Docker:
docker pull tensorflow/tensorflow You need expertise with Docker containers to start a container with the required configurations for your work.
For specific GPU support or downloading a different TensorFlow version, refer to the options available in the official documentation.
Here’s what the command looks like when you want to run it using Docker:
docker run [-it] [--rm] [-p hostPort:containerPort] tensorflow/tensorflow[:tag] [command]Conclusion
Installation of TensorFlow is a one-time thing, and with our guide, it should be a hassle-free process for most.
If you already had prior configurations or setup with older Python versions or an older Conda package manager. Make sure to apply the latest updates to install TensorFlow seamlessly.
You may also explore the best AI Platforms to build AI and ML applications.
Si quiere puede hacernos una donación por el trabajo que hacemos, lo apreciaremos mucho.
Direcciones de Billetera:
- BTC: 14xsuQRtT3Abek4zgDWZxJXs9VRdwxyPUS
- USDT: TQmV9FyrcpeaZMro3M1yeEHnNjv7xKZDNe
- BNB: 0x2fdb9034507b6d505d351a6f59d877040d0edb0f
- DOGE: D5SZesmFQGYVkE5trYYLF8hNPBgXgYcmrx
También puede seguirnos en nuestras Redes sociales para mantenerse al tanto de los últimos post de la web:
- Telegram
Disclaimer: En Cryptoshitcompra.com no nos hacemos responsables de ninguna inversión de ningún visitante, nosotros simplemente damos información sobre Tokens, juegos NFT y criptomonedas, no recomendamos inversiones