
What’s the best way to migrate your WordPress database without coding experience?

Well, it’s a difficult question because the answer may differ in different situations. Certainly, it’s not the non-technical way wherein you copy and paste files from one host to another on your own.
With BackupBuddy’s migration features, you can move the WordPress content, your files, and your database to a new host in one go.
If you’re looking to learn more about BackupBuddy for database migration needs, ensure you read the complete article.
Understanding the Need for Website Migrations
Advancements in technologies demand website upgradation.
It’s always a good idea to adopt new trends instead of sticking with old features and platforms. Besides, restructuring bits and parts of your old website does not work every time.
One of the reasons business owners avoid website migrations is that the process can be costly and time-consuming. And it’s true because it shouldn’t be taken lightly.
It’s scary if you don’t know the correct procedure. It can turn down your business, lose revenue and annoy your customers.
While the risks are involved, it also turns out to be positive in the long term if you do it correctly. Better, you ensure to choose the best possible way to migrate your website to a new domain or host rather than panicking about the results.
Challenges in Migrating WordPress Database Manually
Migrating WordPress databases from one host to another is simple, but things can go wrong if you’re doing it manually.
Below are some of the most common problems that you may experience while migrating WordPress databases manually.
Loss of Files
If you’re migrating a site manually, there’s a full chance that you might miss copying and pasting a file to your new host. In order to avoid this issue, it’s better to take a backup of your existing database and store it in a safe place.
Website Downtime
It’s common to experience downtime while you’re migrating a website to a new server. But visitors will use the existing links to get to your old website and face a 404 error.
SSL Issues
SSL ensures a secure connection, and every domain is provided a unique SSL certificate. If you transfer every file to the new domain, chances are that you might face mixed content errors. In order to solve this problem, you need to reinstall the SSL certificate manually and ensure all the links point to the HTTPS version of your website.
Error Establishing a Database Connection
It’s one of the most common issues faced while migrating a backup file manually. Users often make typo mistakes in the wp-config.php file while entering the database name and username on the new site.
500 Server Error
This issue annoys everyone because it generally doesn’t inform anything about the underlying error cause. It can be due to a glitch in the file programming or the new host does not access your database files. You’ll need to check if the folders are correct and whether all the necessary access permissions are granted.
Let’s look at a WordPress plugin that helps you overcome all the hurdles that you might face in migrating websites manually.
What is BackupBuddy?
BackupBuddy is a powerful WordPress backup plugin that also offers WordPress migration features. The plugin makes it easy to migrate your WordPress site from one host to another or a new URL or domain.
The process is quite simple and involves only a couple of steps.
First, you need to create a complete backup of your WordPress website and download it in a zip format. Second, move your website to a different host by using their ImportBuddy script.
If you want to learn how to migrate an existing website to a new domain or a new host with the BackupBuddy plugin, keep reading this article.
Before we jump into the migration steps, let’s understand the different features BackupBuddy offers.
Features of BackBuddy Plugin
It’s time to explore some popular BackupBuddy features for better database management and migration.
Automatic Website Backups
By default, WordPress does not provide any in-built settings for making scheduled backups. With the BackupBuddy plugin, you can create entire website backups and even schedule automatic backups for your files from time to time.
Here are some of the frequencies that you can select for scheduling backups:
- Daily
- Alternate days
- Weekly
- Twice weekly
- Monthly
- Every quarter
- Twice a year
- Annually
These newly created backups will automatically store on your drive, dropbox, BackupBuddy Stash, or your selected safe place.
WordPress Server Information
BackupBuddy provides you with all the information about your server configuration on the server tab menu. That means you don’t have to login into your hosting account to check server details like PHP version, memory limit, PHP execution time, and database-related information.
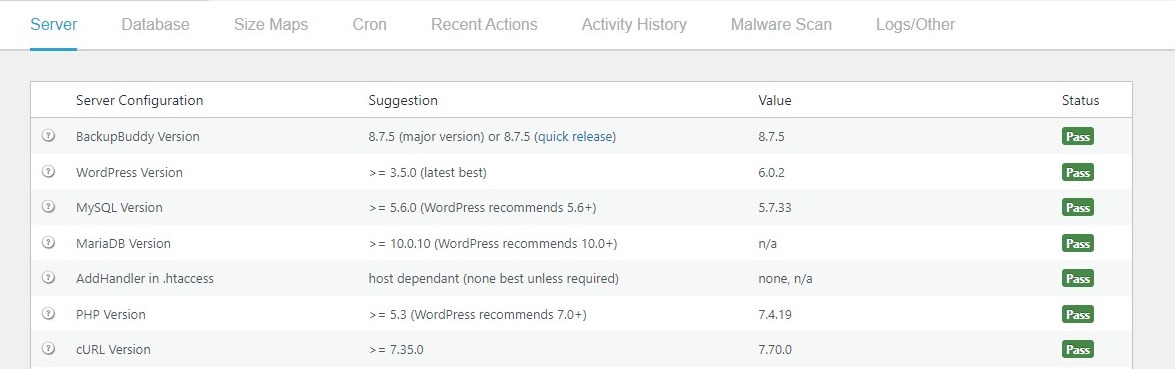
Looking at the stats from the server menu tab, you can also get an insight into the type of themes and plugins running on your website.
Malware Scanning
Malware is a threat to your online business website injected without your knowledge. Fortunately, BackupBuddy provides a built-in malware scanner that protects you against website malware attacks and restores clean backups, so your website is always up and keeps running.
Staging site
BackupBuddy’s Deployment feature helps you create a WordPress staging site that you can use for testing changes. It’s a common way designers adopt to show the changes to their clients before implementing changes on a live website.
BackupBuddy allows you to connect your existing live website to the staging website. This way, you can push all the changes to the live website in just a few clicks.
Selected Database Rollback
When creating backups, BackupBuddy lets you choose which files to include or exclude. It’s particularly helpful if your website has a lot of images and does not wish to back up the images repeatedly.
Storage Destinations
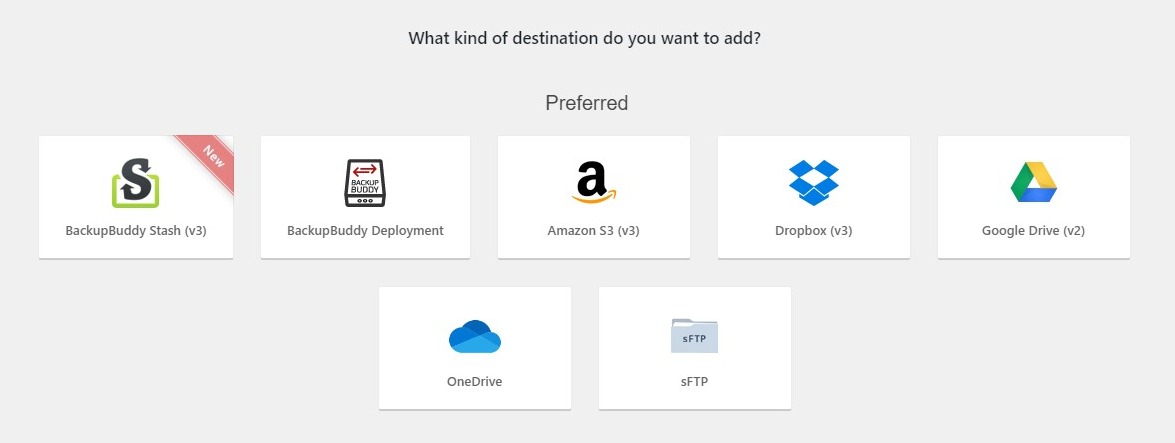
BackupBuddy offers you multiple storage choices for saving your backups. For example, you can save your backup files in your Google Drive, Dropbox, SFTP, or Amazon S3 storage module and even save them on your local computer’s storage memory.
BackupBuddy also offers its own storage space called BackupBuddy Stash. All BackupBuddy customers get 1GB of free Stash space which makes storing backups much easier and hassle-free.
All your backups on Stash are safe and use high-level security encryption just like other storage providers like Google or Amazon. You can view and download your backups anytime by logging into your iThemes dashboard.
You can easily restore backups from Stash with the help of the Restore option from the BackupBuddy settings dashboard.
Setting BackupBuddy Plugin for Website Migration
Migrating a WordPress website manually is time-consuming and tricky. Thanks to the BackupBuddy plugin, helps you speed up the process of migrating the website to a new domain, new hosting, or moving a staging WordPress website to a live environment.
It’s time to check the actual steps for migrating a WordPress website from start to end using the BackupBuddy plugin.
Step 1: Installing the BackupBuddy Plugin.
Since BackupBuddy is a premium plugin, you’ll need to purchase the plugin from their website.
Once you signup for the plugin, log in to your iThemes account and visit the downloads page. Click on the BackupBuddy tab and download the plugin zip file.
Next, log in to your WordPress website and navigate to Plugins > Add New > Upload. Click on the Upload button and select the downloaded BackupBuddy file from your computer.
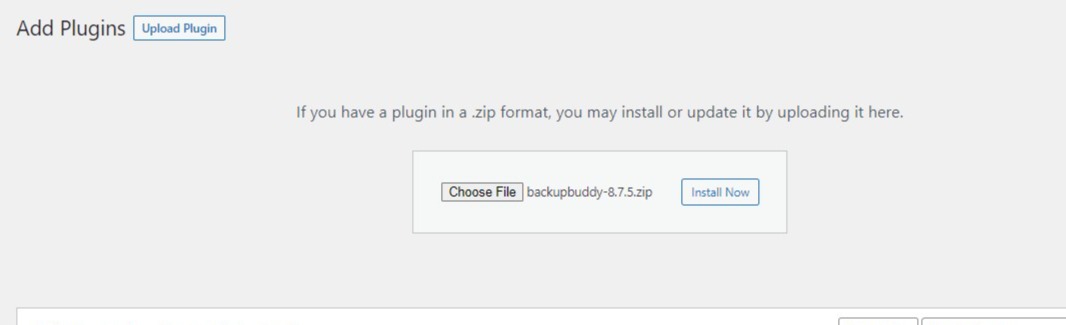
Once you upload the plugin, click on Activate button to install and activate the plugin on your website.
Step 2: Creating a Website Backup
BackupBuddy offers different types of Backups. For example, you can create complete backups and set inclusion/exclusion rules for backing up selective files.
For the sake of this tutorial, we’ll select the Complete Backup option. This will automatically include all the files and folders in the backup database.
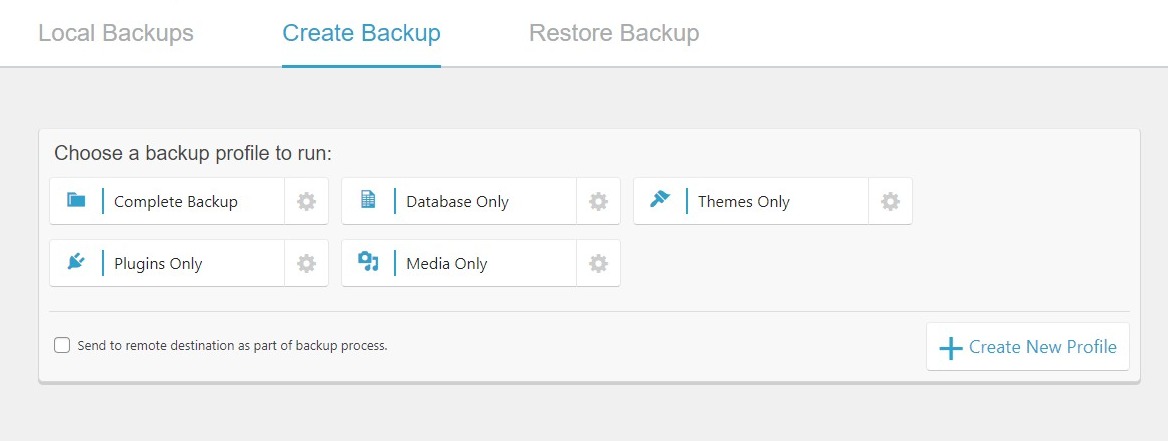
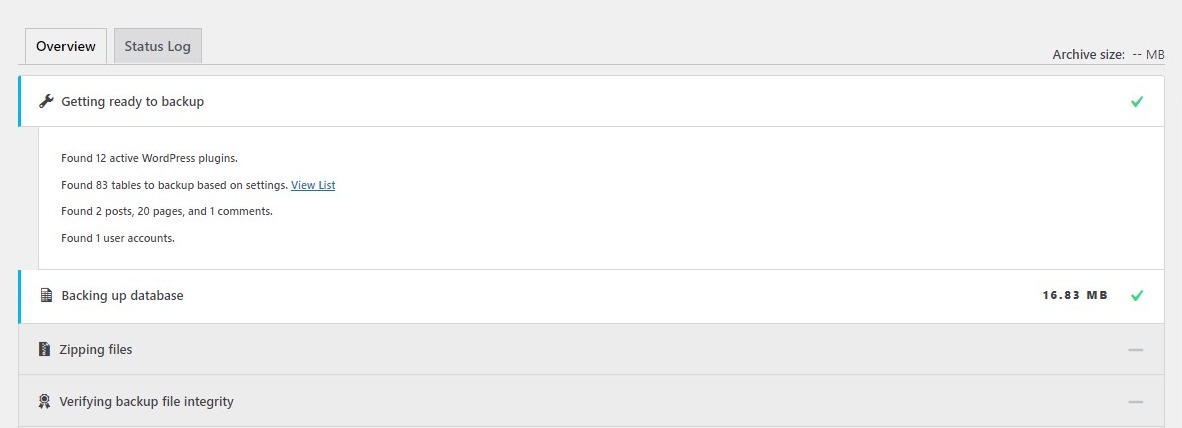
To start the backup process, navigate to Backup and click on the Complete Backup button. The process takes some time, and if it gets stuck due to any reason, you can go to the Status Log tab to overview the errors.
Once the backup gets completed, download the backup file by clicking on the Download Backup File button. The zip file contains all the files from your database, and you can expect it to be large in size.
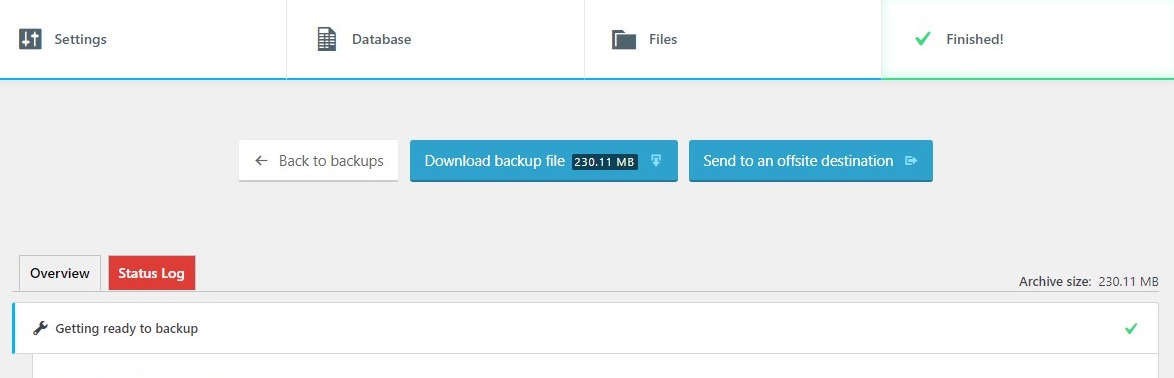
Save the downloaded zip file on your computer before we move to our next step.
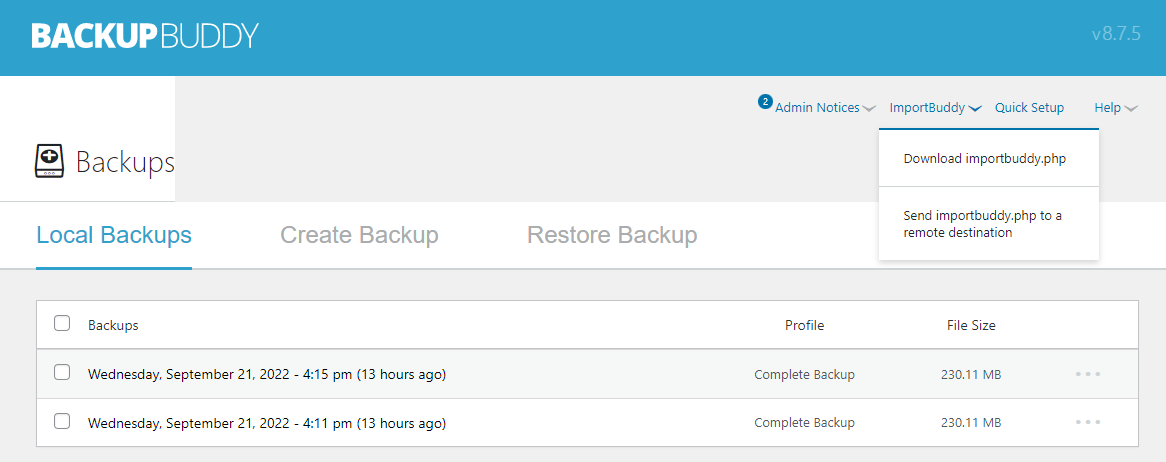
Step 3: Download ImportBuddy Script
In order to download the ImportBuddy script, click on the Download Importbuddy.php link.
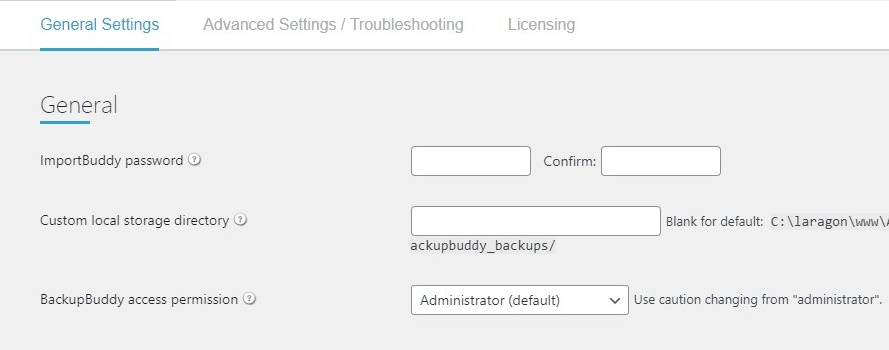
You’ll be prompted to set a password. Ensure you set a strong password for this script. If you wish to speed up the process, you can set a password from the settings and leave this field blank.
Save the importbuddy.php script in the same folder where you saved the backup folder.
Step 4: Uploading Files to New Server
Now that you have the BackupBuddy file and the Importbuddy.php script, it’s time to upload the files to your new server.
Go ahead to your hosting provider’s dashboard and navigate to File Manager.
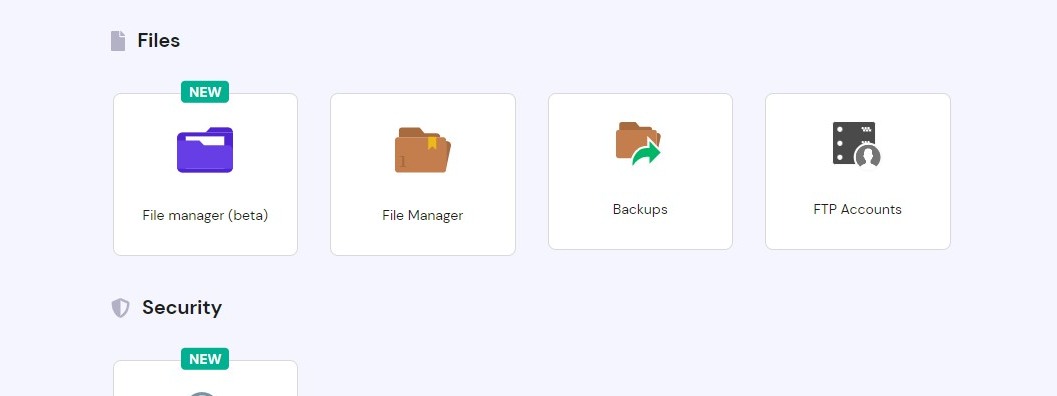
Generally, you’ll find the public_html folder within every hosting panel and that’s where you need to upload the downloaded files.
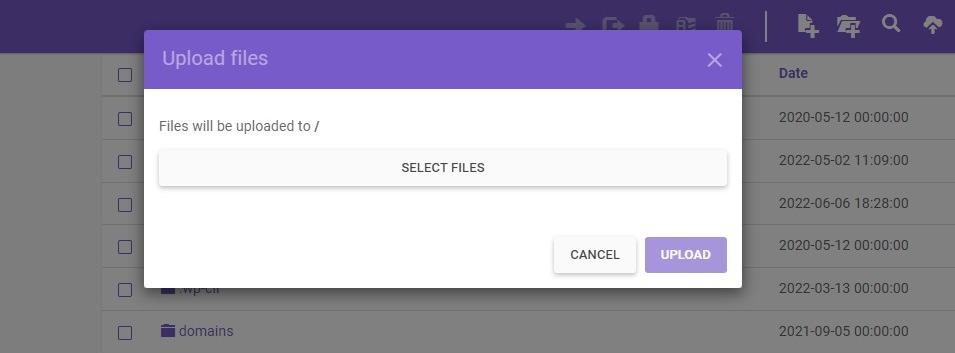
Click on the Upload button and select the files to start the process. Normally, it takes a few minutes to complete the upload process, but it’s dependent on your file size.
Please make sure you delete any unnecessary files to avoid migration issues.
Now, it’s time to create a database to access all the dynamic content from your old website. You can now set your database name, username, and password for your database and provide access rights for the administrator.

Once you complete the database setup, go to your yourdomain.com/importbuddy.php. Enter the password and click on Authenticate.
Click on Restore Backup, and on the next step, you’ll need to enter the database credentials. Once you enter the details, BackupBuddy will create the database in your new destination place.
At last, check if the New URL is correct. By default, BackupBuddy will take care of migrating all the URLs to your new website.
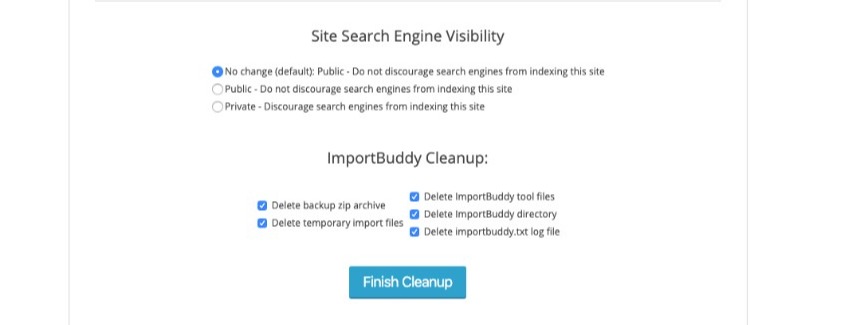
This brings us to the last step for finishing the migration process. Make sure you check your newly migrated website before clicking the “Finish Cleanup” button.
Before making any new changes like adding or editing links, go to Permalinks from the settings and ensure your permalink structure is the same that you wanted.
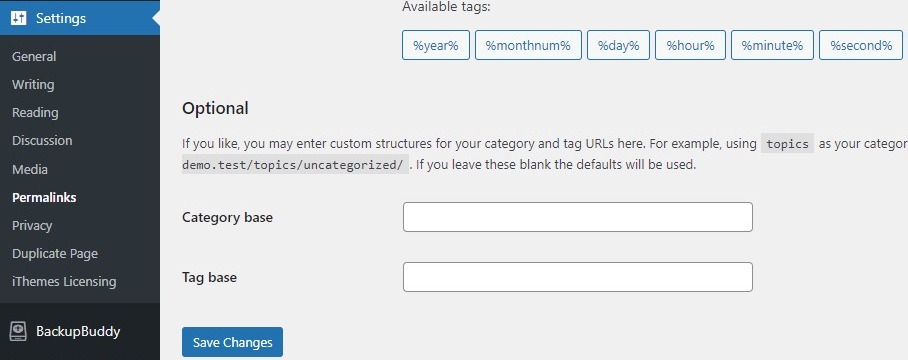
If it is, click on “Save Changes“.
That’s it!
You’ve successfully completed migrating your WordPress site to a new destination.
BackupBuddy Pricing
BackupBuddy plugin is available in four different pricing plans.
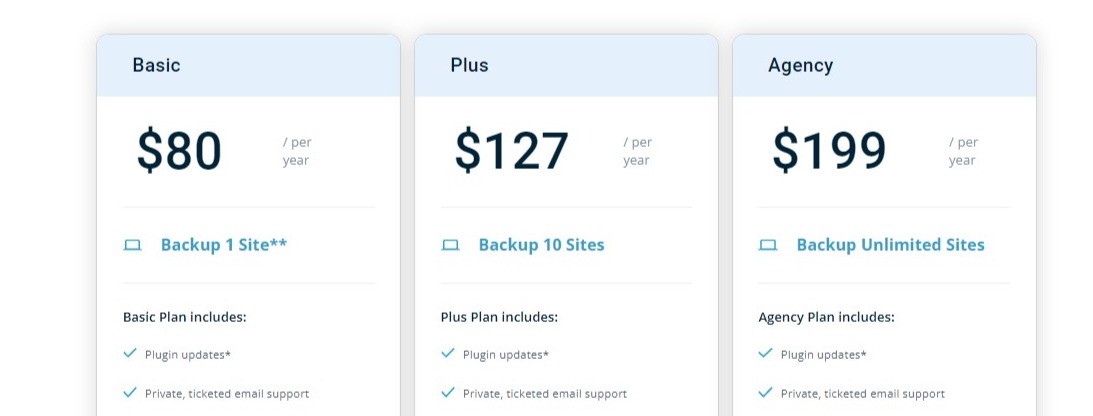
#1. Basic
The basic plan is the lowest pricing plan that will cost you only $80 for a single-year license. Within the basic plan, you’re entitled to get regular plugin updates, dedicated email support, 1GB BackupBuddy storage space, and backup for one site.
#2. Plus
The BackupBuddy Plus plan is priced at $127 for a single-year license. Similar to the Basic pricing plan, you get regular plugin updates, email ticket support, and 1GB BackupBuddy Stash storage space. However, with the Plus plan, you can back up 10 websites.
#3. Agency
For agencies that work with many WordPress clients, it is advisable to go with the agency pricing plan because there is no website limit. You can back up unlimited websites by paying just $199 for a single-year license.
With this plan, you get 5GB of BackupBuddy stash storage space beside the regular plugin updates and dedicated customer support.
#4. Plugin Suite
Plugin suite is a bundle that includes themes plugins like Restrict Content Pro Professional with 34 Pro Add-ons, iThemes Security Pro, BackupBuddy Agency plan, and regular updates along with premium support for all the plugins.
BackupBuddy Alternatives
Although BackupBuddy is one of the best WordPress database migrator plugins, you can check out other popular migration plugins available.
Here are some BackupBuddy Alternatives that you can try.
UpdraftPlus Migrator

UpdraftPlus is a popular WordPress backup plugin that’s actively installed over a million times from the WordPress plugin repository. After creating backups, UpdraftPlus allows users to store them on Google Drive, Dropbox, FTP, and Amazon S3.
The plugin offers a premium feature Updraftplus Migrator, as an addon in all UpdraftPlus Premium packages. Using the premium UpdraftPlus plugin dashboard, you can quickly clone your website or migrate it to a new URL in minutes.
SnapCreek
 cryptoshitcompra.com/wp-content/uploads/2022/10/1664660244_518_Migrate-Databases-Seamlessly-with-BackupBuddy.jpg» alt=»YouTube video» width=»480″ height=»360″ data-pin-nopin=»true»/>
Snapcreek, popularly known as the Duplicator plugin, is a powerful WordPress website migrator plugin that has been actively installed over a million times. The plugin allows users to migrate or clone websites without requiring any coding knowledge.
With Duplicator, you can automatically schedule website backups and store them on dropbox, FTP, Google Drive, or Amazon S3 for safe storage. Duplicator will send you an email whenever it creates a backup or finds any issues during the backup process.
Summary
BackupBuddy plugin is a powerful tool that makes WordPress migration easy and much faster. If you’re looking for a hassle-free way to migrate a WordPress site, we recommend looking into BackupBuddy’s migration features to make the process easier.
We hope you enjoyed our post on migrating your database with the BackupBuddy plugin and avoiding getting stuck in a manual process.
If you’re interested in learning more about WordPress database management, don’t forget to check our list of WordPress backup and migration plugins.
Si quiere puede hacernos una donación por el trabajo que hacemos, lo apreciaremos mucho.
Direcciones de Billetera:
- BTC: 14xsuQRtT3Abek4zgDWZxJXs9VRdwxyPUS
- USDT: TQmV9FyrcpeaZMro3M1yeEHnNjv7xKZDNe
- BNB: 0x2fdb9034507b6d505d351a6f59d877040d0edb0f
- DOGE: D5SZesmFQGYVkE5trYYLF8hNPBgXgYcmrx
También puede seguirnos en nuestras Redes sociales para mantenerse al tanto de los últimos post de la web:
- Telegram
Disclaimer: En Cryptoshitcompra.com no nos hacemos responsables de ninguna inversión de ningún visitante, nosotros simplemente damos información sobre Tokens, juegos NFT y criptomonedas, no recomendamos inversiones