

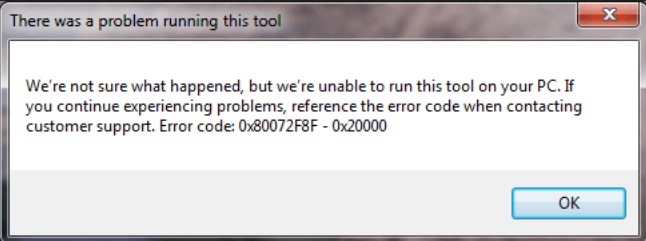
Are you also dealing with Microsoft Media Creation Tool’s error code 0x80072F8F 0x20000 and looking for a guide to help you fix it? If yes, you have stumbled upon the right webpage. 👍

Error code 0x80072F8F 0x20000 is a very common error code that people see when they try to upgrade their Windows OS using Media Creation Tool. This error code can be frustrating as it prevents you from upgrading your OS.
The worst part here, however, is that there is no official information from Microsoft that clearly explains why this error code triggers. Thankfully, there are some workarounds that you can follow to fix the error in no time.
This article covers detailed information about what this Media Creation Tool error code 0x80072F8F 0x20000 means, why it occurs, and most importantly, how to fix it.
So, without any further ado, let’s get started.
What is Error Code 0x80072F8F 0x20000, and why does it occur?
Even though there is no official statement about this error code 0x80072F8F 0x20000 and why it occurs, it is believed that this error gets triggered when the server that Microsoft Media Creation Tool tries to communicate with no longer supports the old TLS 1.0 security protocol for communication.
However, it is just speculation based on the troubleshooting solutions that have worked for a majority of users that were dealing with the same error.
Besides that, the other possible causes that could trigger this error code 0x80072F8F 0x20000 on Media Creation Tool are:
- Corrupted Cache or Temporary Files – The process of downloading and executing installation files creates some cache and temporary files on your computer. Even though these files are important, if corrupted, they could interfere with Microsoft Media Creation Tool and trigger this error.
- Conflict between Third-Party Apps – Sometimes, third-party apps installed on your computer may cause conflict with the Microsoft Media Creation Tool, and as a result, you will encounter this error.
- Lack of Admin Privileges – Since Microsoft Media Creation Tool makes system-level changes, it needs admin privileges. If you are currently running your machine as a guest user or not providing this tool admin access, it could be the reason you are facing this error code 0x80072F8F 0x20000.
- Incompatible System Requirements – To upgrade your Windows OS, your device must meet minimum system requirements to properly install the OS. If your current system specification isn’t compatible with the Windows OS version you want to upgrade to, you may encounter this error.
- Lack of Essential Services – Most of the time, errors like error code 0x80072F8F 0x20000 can occur due to the lack of essential services that are required for programs like Microsoft Media Creation Tool to function properly.
- Poor Internet Connection – Many people have reported that they were facing this error because of an unstable internet connection. This may not be the case for everyone, but if your internet connection isn’t stable, it would be a great idea to restart the OS upgrade process once your internet connection gets stable and starts delivering decent speed.
Now that you know the possible reasons that could’ve triggered this error, let’s discuss some of the best workarounds you can apply to fix it.
Ways to Fix Error Code 0x80072F8F 0x20000
As stated above, Microsoft has no official clarification about what triggers this error. Therefore, our workarounds are based on solutions that have worked for other Windows users with the same error.
As I mentioned, the Microsoft Media Creation Tool helps you update your Windows OS and thus makes system-level changes. Therefore, it requires Admin privileges and rights, and the lack of Admin access can be a possible reason you are facing this error.
This error may trigger because the user account that you are currently using doesn’t have administrative rights. In such a scenario, running the Microsoft Media Creation Tool as an Administrator may fix the error.
To run Media Creation Tool as an administrator, you need to follow these simple steps –
- First, navigate to the folder where you have stored the Microsoft Media Creation Tool file.
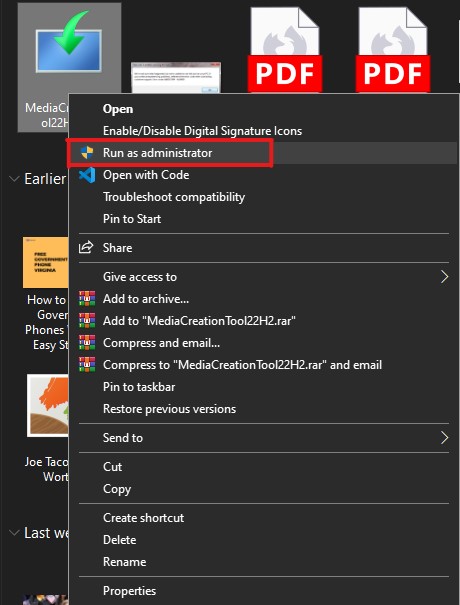
- Locate the Media Creation Tool file and right-click on it.
- From the context menu, select the Run as administrator option.
- A UAC prompt will appear on your screen, asking you to confirm your decision. Simply select the Yes button to confirm.
That’s it. This is how you can give Microsoft Media Creation Tool administrative rights.
Now, check if the issue has been resolved. If it isn’t, try following the next workaround.
Enable TLS 1.1 and TLS 1.2
This is one of the most widely observed reasons people encounter this error code 0x80072F8F 0x20000. This could be because your computer might have a dated TLS version enabled.
TLS allows you to establish secure and encrypted connections over the internet. Most outdated Windows computers only have TLS 1.0 and SSL3 enabled.
Microsoft, on the other hand, uses upgraded TLS 1.1 and TLS 1.2 security protocols for its servers.
This incompatibility of TLS versions can be the reason that every time your computer tries to establish a connection with a Microsoft server, the connection fails and shows the error code 0x80072F8F 0x20000.
To fix this error, you must enable TLS 1.1 and TLS 1.2.
There are two ways you can do that.
- Enable from Internet Settings using the GUI.
- Make changes in the registry.
We have covered both of these methods below.
Enable TLS 1.1, TLS 1.2, and TLS 1.3 using GUI
To enable all these TLS versions using GUI, you need to follow these simple steps –
- First of all, launch the Run window. For this, press the Win+R buttons on your keyboard.
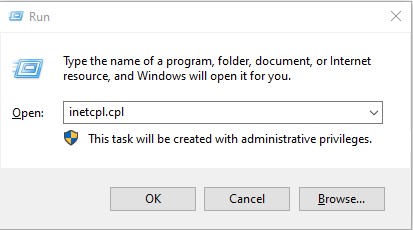
- Type
inetcpl.cpland hit enter. This will launch the Internet Properties window for you.
- Go to the Advanced Tab.
- Scroll down on the list of Settings and select TLS 1.1, TLS 1.2, and TLS 1.3.
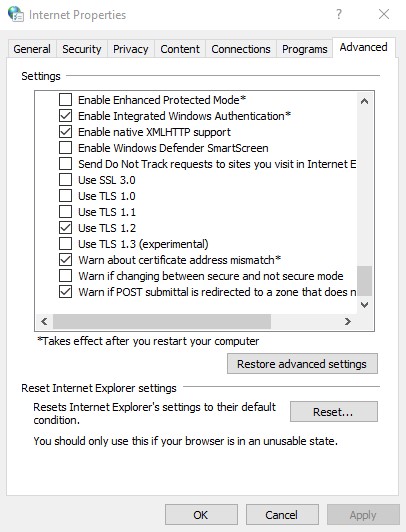
- Click on the OK button to save all the changes that you made.
- Now, click on the Apply button to apply all the changes.
- Restart your computer.
After that, rerun the Media Creation Tool to see if it has resolved the error.
If you can’t see TLS 1.1 and TLS 1.2 on the list, you can only enable these versions by making changes in the registry file.
Enable TLS 1.1 and TLS 1.2 by making changes in Registry
Disclaimer – Before proceeding further, let me clearly warn you that this method makes changes in the registry, which may become risky if something goes wrong. I strongly recommend creating a backup of the current registry.
Follow these simple steps to create a backup of the current registry –
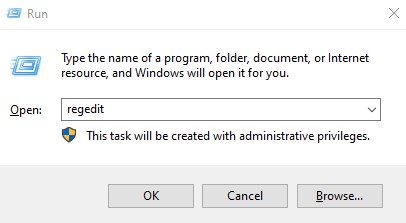
- First of all, launch the Run command. For this, you need to press the Win+R key on your keyboard.
- In the comment box, type
regeditand hit Enter key. This will open the Registry Editor.
- Now, click on the File tab, and click on the Export option from the drop-down menu.
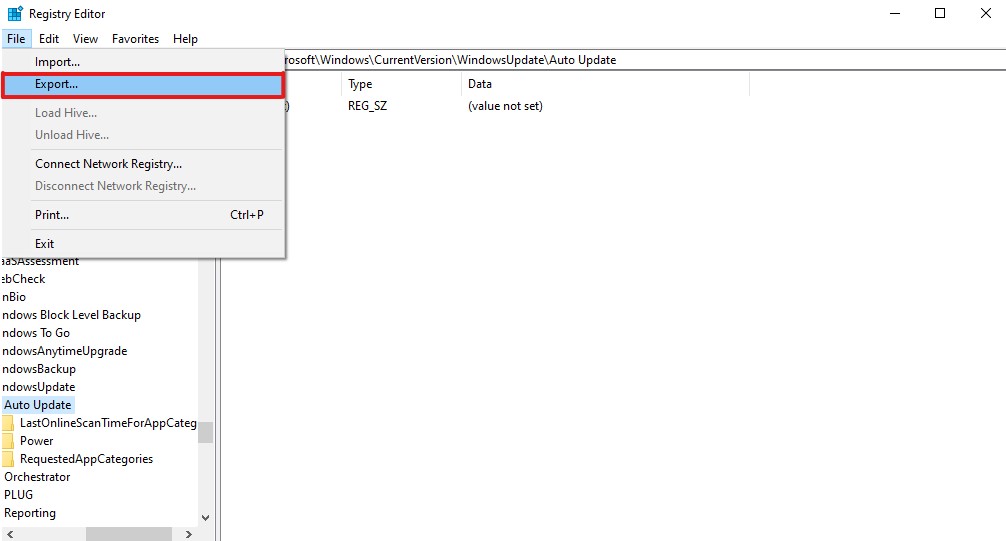
- Export the Registry file and save it to any of the folders of your choice.
That’s it. You have successfully created a backup of your registry.
Now, follow these steps to make changes in the Windows registry settings –
- First of all, launch Notepad.
- Now, copy this code and paste it into Notepad –
Windows Registry Editor Version 5.00

[HKEY_LOCAL_MACHINE\SOFTWARE\Microsoft\Windows\CurrentVersion\Internet Settings\WinHttp]

"DefaultSecureProtocols"=dword:00000a00

[HKEY_LOCAL_MACHINE\SOFTWARE\Wow6432Node\Microsoft\Windows\CurrentVersion\Internet Settings\WinHttp]

"DefaultSecureProtocols"=dword:00000a00

[HKEY_LOCAL_MACHINE\SYSTEM\CurrentControlSet\Control\SecurityProviders\SCHANNEL\Protocols\TLS 1.1\Client]

"DisabledByDefault"=dword:00000000

"Enabled"=dword:00000001

[HKEY_LOCAL_MACHINE\SYSTEM\CurrentControlSet\Control\SecurityProviders\SCHANNEL\Protocols\TLS 1.2\Client]

"DisabledByDefault"=dword:00000000
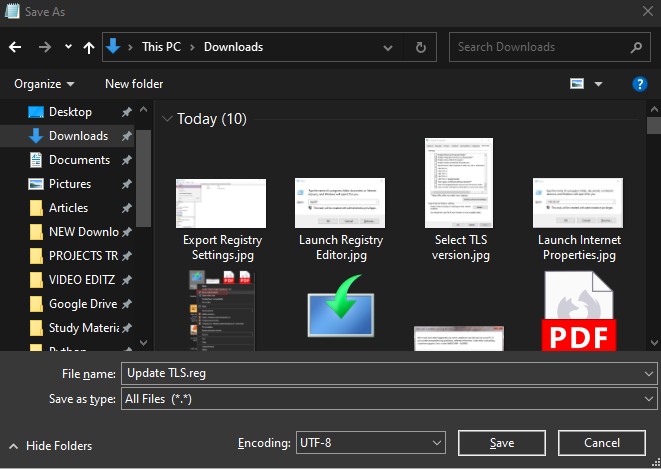
"Enabled"=dword:00000001- Now, save this file with a .reg extension. You can do that by typing the
update TLS.regin the File name box and selecting All files from the Save as type list.
- Now, locate this file on your Windows machine.
- Double-click on it to execute the file and apply registry settings.
- If the UAC prompt appears, click on the Yes option.
- Once the file is executed properly, restart your computer.
Once your computer reboots, it will have TLS 1.1 and TLS 1.2 enabled.
Now, launch the Media Creation Tool to check if the error code 0x80072F8F 0x20000 has been fixed. If not, try the following workaround.
Make sure your computer meets the Minimum System Requirements
If you are still facing this error, it could be because of your system’s configuration.
This error may occur if your computer specification doesn’t meet the minimum system requirements to run the Windows OS you want to upgrade.
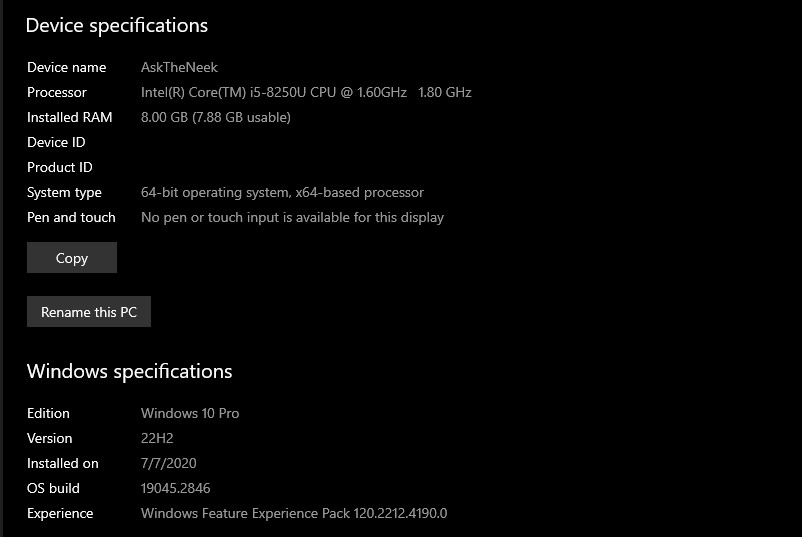
If you are not sure if this is the reason, simply cross-check your system’s configuration with the below-shared requirements of Windows 10 and 11.
To upgrade to Windows 10, the minimum system requirements are as follows –
- Processor – 1 GHz or faster processor
- RAM – 1 GB for 32-bit and 2 GB for 64-bit OS
- Hard Disk – 16 GB for 32-bit or 20 GB for 64-bit OS
- Graphics card – Compatible with DirectX 9 or later with WDDM 1.0 driver
The minimum system requirements for Windows 11 are –
- Processor – 1 GHz or faster processor with a minimum of 2 cores
- RAM – 4 GB or higher
- Hard Disk – 64 GB or higher
- Graphics card – Compatible with DirectX 12 or later with WDDM 2.0 driver
Restart Windows Services
If your machine meets the minimum system requirements, yet you are facing this error, there are chances that some Windows services might be the culprit.
In this scenario, you can follow the below-shared workaround to restart Windows services to see if it fixes this error for you –
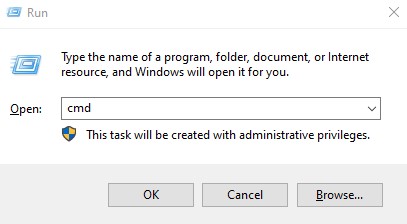
- First of all, launch the Command Prompt as an administrator. You can do that by pressing Win+R, typing
cmdinto the box, and then hitting CTRL+Shift+Enter simultaneously.
- After that, type these commands shared below one by one and hit Enter after each command. These commands will stop all Windows services, including Windows Update, Background Intelligent Transfer Services, Application Identity, and Cryptographic Services.
net stop bitsnet stop wuauservnet stop appidsvcnet stop cryptsvc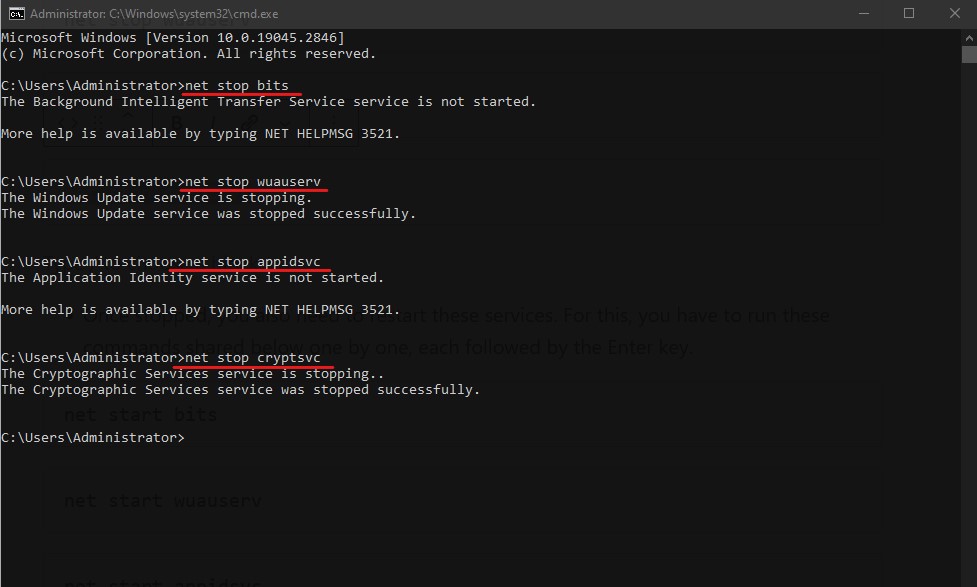
- Once stopped, you also need to restart these services. For this, you have to run these commands shared below one by one, each followed by the Enter key.
net start bitsnet start wuauservnet start appidsvcnet start cryptsvc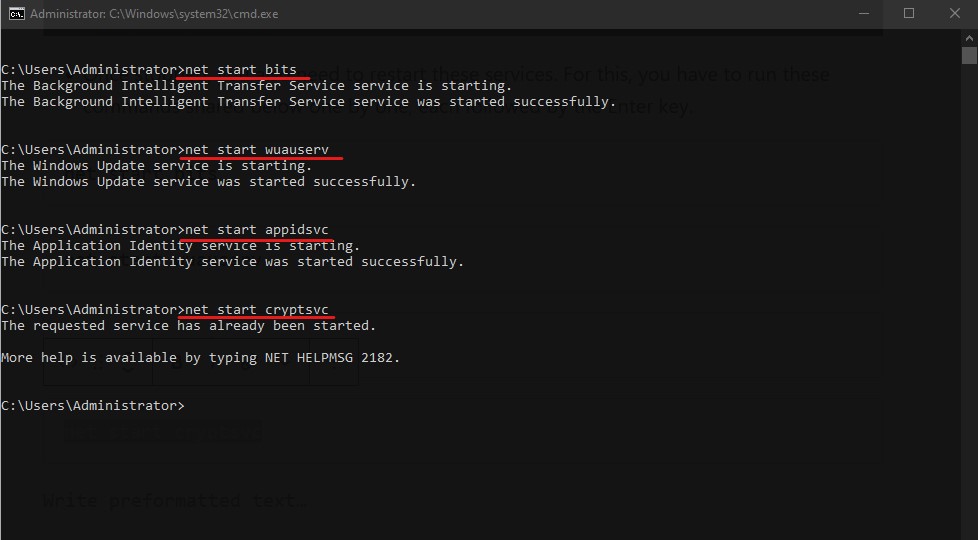
- Once all the commands have been executed, type
exitin the Command Prompt and hit enter.
Run the Media Creation Tool again with administrative access to see if restarting Windows services has fixed the error.
Allow OS Upgrade from Windows Registry
Disclaimer – Making any changes in the registry can be fatal. Therefore, I’d recommend you create a backup file of the current registry to avoid any risk. Besides that, I’ll also recommend following the steps very carefully.
Another possible reason you are dealing with error code 0x80072F8F 0x20000 could be that your computer’s Windows policy isn’t allowing you to upgrade the OS. In such a scenario, you can make changes in the Windows registry to allow your OS to be upgraded.
Here is how you can do that:
- First of all, launch the Run dialog box. You can do that by simply pressing the Win+R key.
- Now, type
regeditand hit Enter.
- Directly paste the following path into the navigation bar and hit enter.
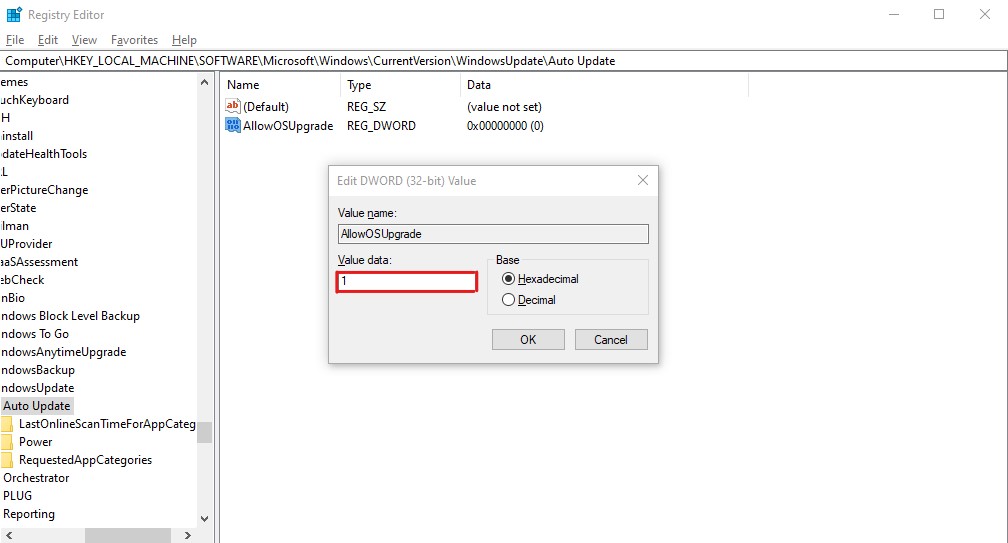
Computer\HKEY_LOCAL_MACHINE\SOFTWARE\Microsoft\Windows\CurrentVersion\WindowsUpdate\Auto Update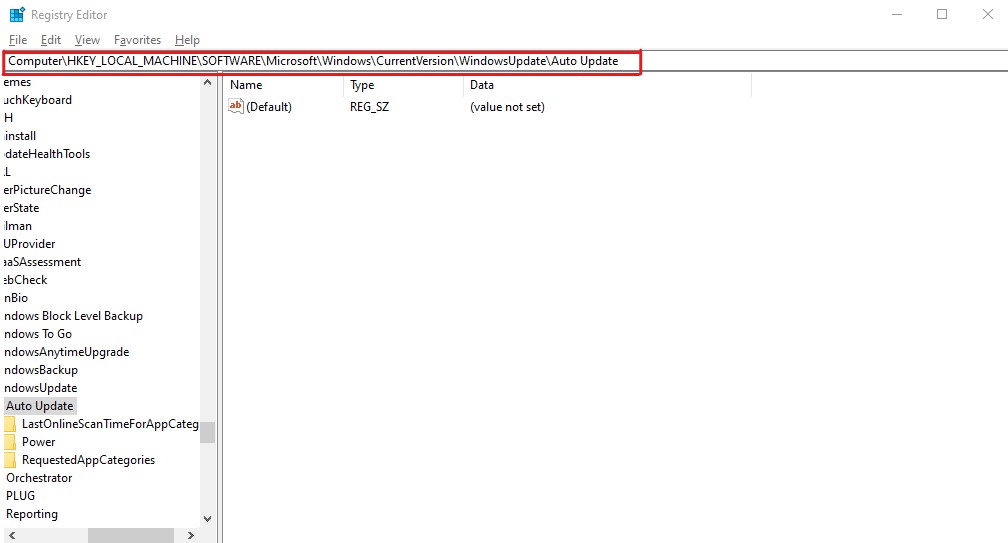
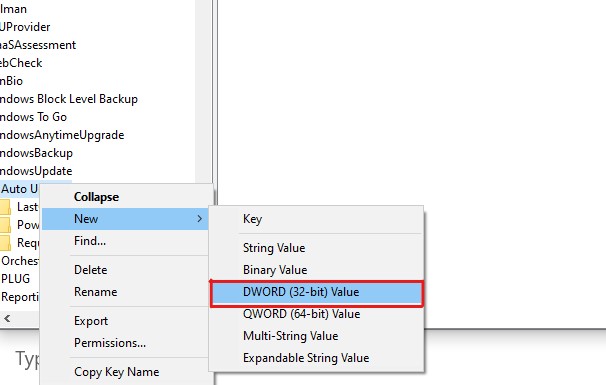
- You have to right-click on the Auto Update, select New, create a DWORD file, and name it AllowOSUpgrade.
- Double-click on this recently created file, set its Value Data to 1, and click the OK button.
That’s it. The changes have been applied, and now all you have to do is run the Media Creation Tool to check whether the error has been fixed.
Clear SoftwareDistribution Folder
As already explained, sometimes, error code 0x80072F8F 0x20000 may get triggered because of corrupted caches and temporary files. If the workarounds mentioned above haven’t worked for you, you can try clearing files from the SoftwareDistribution folder.
Why this folder specifically? Well, that is because whenever you try to install a Windows update, all the temporary files required for the installation get stored within a sub-folder of this SoftwareDistribution folder.
Here, you can clear the SoftwareDistribution folder on your PC and fix the error code 0x80072F8F 0x20000.
- First of all, launch the Command Prompt. You can do that by pressing Win+R, typing
cmdinto the box, and then hitting CTRL+Shift+Enter.
- Now, you have to stop Windows Update and Background Intelligent Transfer Services. For this, you can type the following commands one by one, each followed by Enter key –
Net Stop wuauservNet Stop bits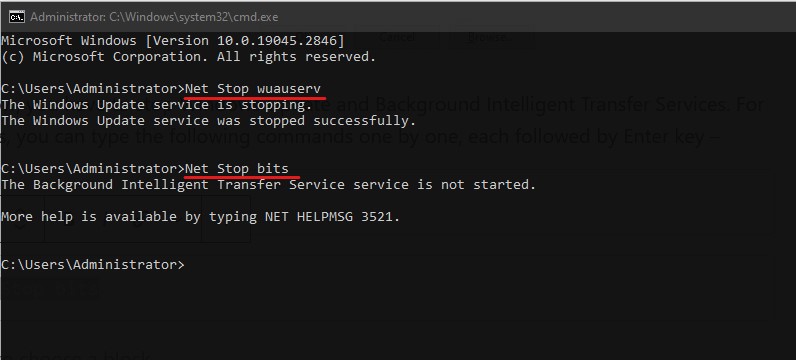
Don’t close the Command Prompt, as we’ll have to restart these services again.
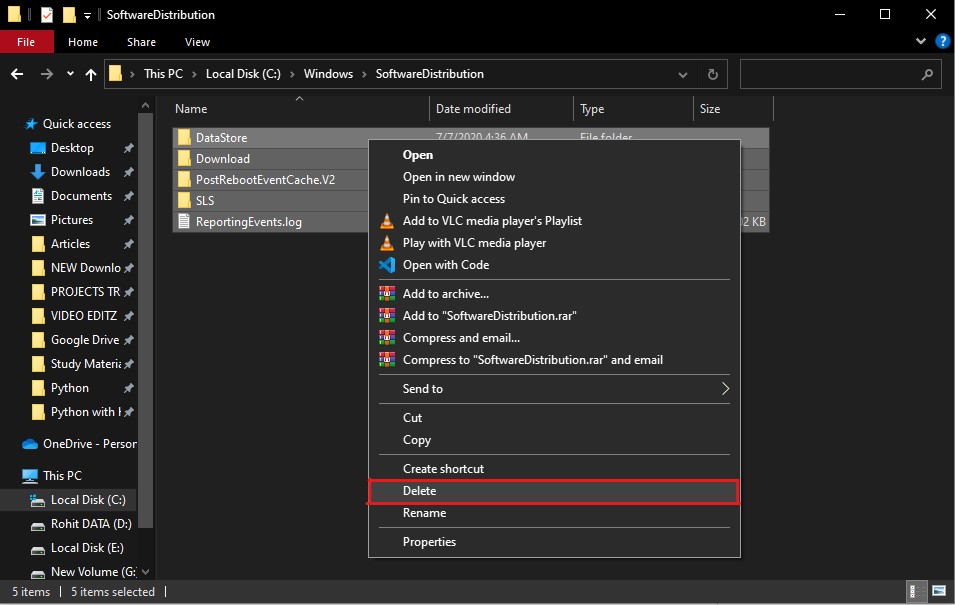
- Launch the Windows File Explorer. You can do that simply by pressing the Win+E key.
- Enter the below-shared path in the address bar and hit Enter.
C:\Windows\SoftwareDistribution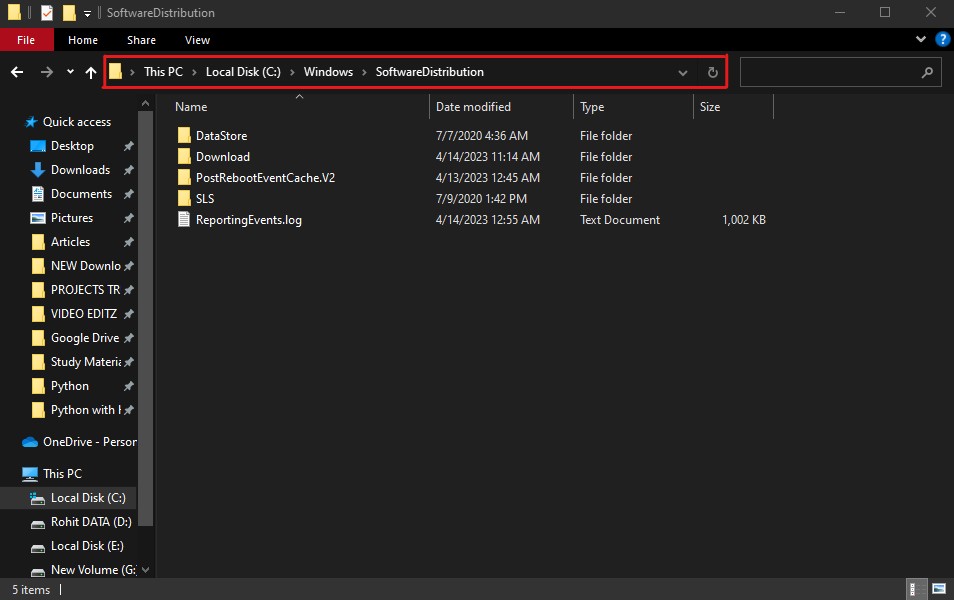
- Select all the files inside this folder and delete them. You can do that simply by pressing the CTRL+A and then the Del key. If asked for Administrative Permissions, select the Continue option.
- Get back to Command Prompt to restart the services that we stopped earlier. For this, just type below shared commands one by one, each followed by the Enter key –
Net Start wuauservNet Start bits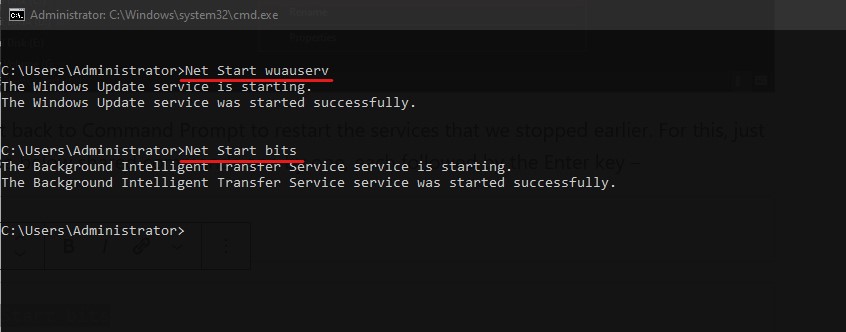
Now, restart your computer and rerun the Media Creation Tool to see if the issue persists.
Perform a Clean Boot
Sometimes, apps in the background that have been running for quite a long temporarily block or create conflict with some services that are essential for the Media Creation Tool.
If that’s the case with you, you can perform a clean boot to temporarily close these unnecessary apps so they don’t affect the Media Creation Tool.
To perform a clean boot on Windows, you need to follow these simple steps –
- First of all, launch the Run window. You can do that by pressing the Win+R keys.
- Type
msconfigand hit Enter. It will take you to the System Configuration app.

- In the General tab, you have to select the Selective Startup option. Make sure to uncheck the Load startup items option.

- After this, click the Services tab and check the Hide all Microsoft Services option.
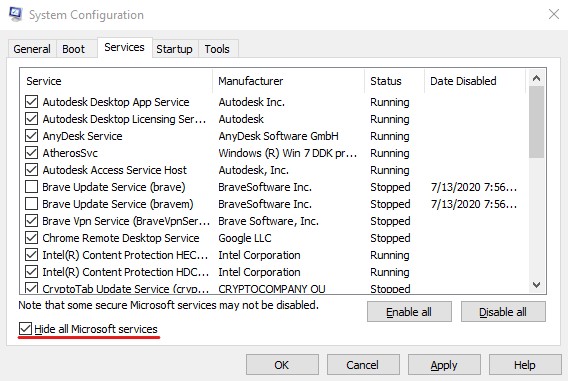
- Now, click on the Disable All button.
- Click on the Apply button and then the OK button to save all the changes you made.
After that, restart your PC and rerun the Microsoft Media Creation Tool to see if the error has been fixed.
Make sure your internet is good and stable
Since the Media Creation Tool downloads system files, it requires a stable internet connection.
If the connection is disruptive or unstable, it may result in the form of error code 0x80072F8F 0x20000. Therefore, ensure your internet connection is stable and delivers a decent speed.
Free Up Disk Space
Microsoft Media Creation Tool, by default, uses your C Drive to download and store installation files. Therefore, if your C Drive doesn’t have sufficient space to download the system files, you may face this error.
In such a scenario, consider freeing up some space on your C Drive so that all the OS upgrade-related files can be downloaded and executed properly without any issues.
There you have it – a detailed article covering how to fix error code 0x80072F8F 0x20000 on Windows 10/11.
Since there isn’t any official statement from Microsoft that explains why this error occurs, it is difficult to suggest a solution that may work for everyone. Therefore, you have to go for the hit-and-try method.
To make things easier for you, I have compiled a list of workarounds that have worked for other users. I hope this will help you troubleshoot this error.
Also, check some of the registry hacks to help improve your Windows 11 experience.
Si quiere puede hacernos una donación por el trabajo que hacemos, lo apreciaremos mucho.
Direcciones de Billetera:
- BTC: 14xsuQRtT3Abek4zgDWZxJXs9VRdwxyPUS
- USDT: TQmV9FyrcpeaZMro3M1yeEHnNjv7xKZDNe
- BNB: 0x2fdb9034507b6d505d351a6f59d877040d0edb0f
- DOGE: D5SZesmFQGYVkE5trYYLF8hNPBgXgYcmrx
También puede seguirnos en nuestras Redes sociales para mantenerse al tanto de los últimos post de la web:
- Telegram
Disclaimer: En Cryptoshitcompra.com no nos hacemos responsables de ninguna inversión de ningún visitante, nosotros simplemente damos información sobre Tokens, juegos NFT y criptomonedas, no recomendamos inversiones